
Sublimation is a very popular method of decorating everything from shirts, drinkware, and everything in between. The process is quick and the results speak for themselves. In this blog, we will go through the process of using Sawgrass Creative Studio and Print Manager to print transfers on a Sawgrass SG1000 sublimation printer!
Process:
When using Sawgrass to print sublimation transfers, it is recommended that you use Sawgrass Creative Studio and Print Manager. Log into your Creative Studio account, and press start creating. That will bring you to this screen:

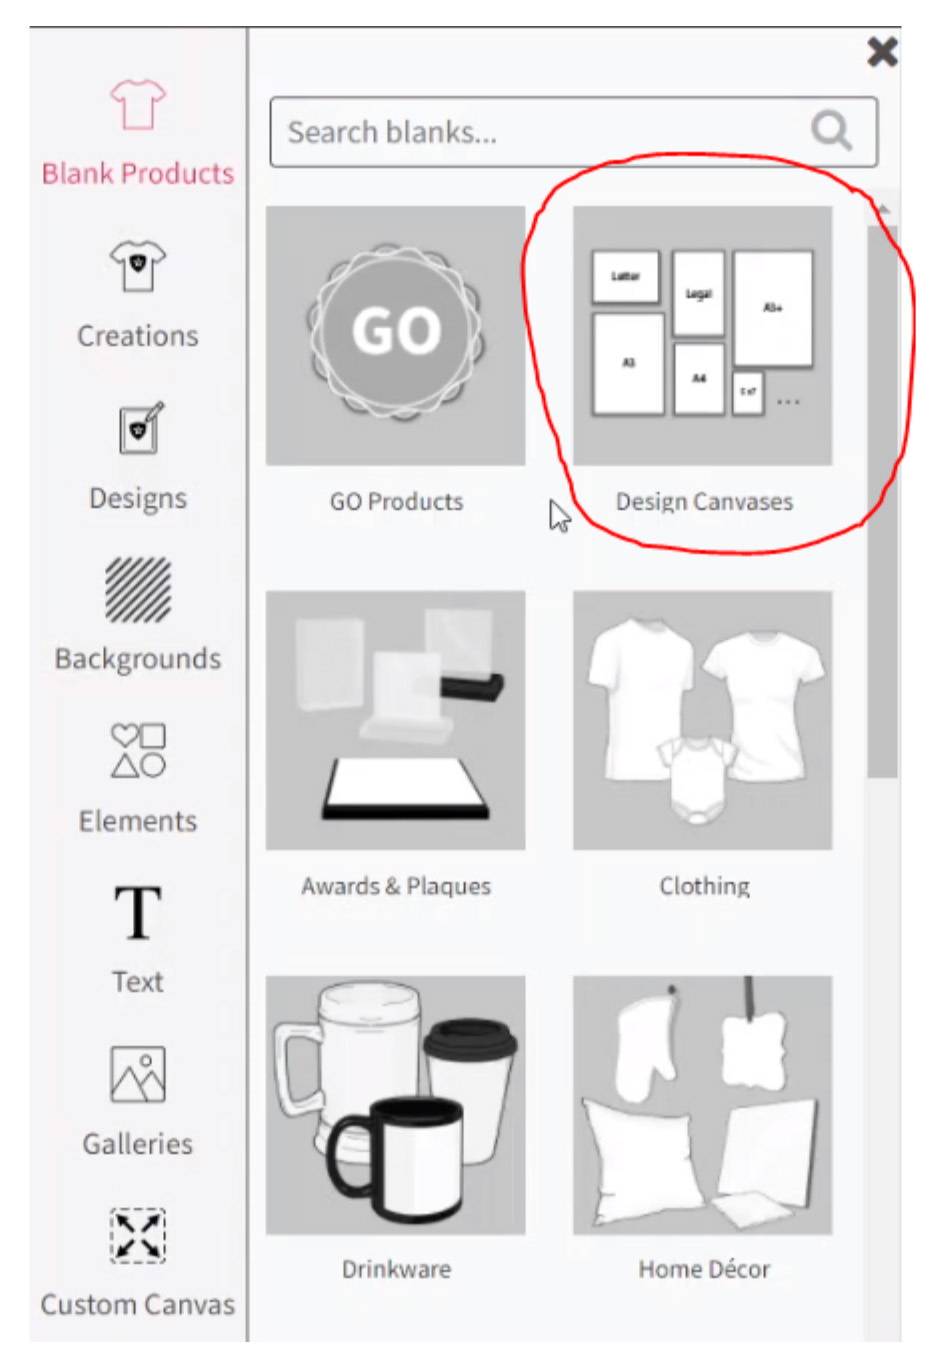
Once you are here, you can change the canvas to the size of your paper using the “Design Canvases” option under the “Blank Products” tab. When that loads, select the correct size of canvas to match your sublimation paper.
From there, you will upload your image that you want to print! To do that, click galleries on the left hand side of the screen, and then “My Images”.

After that, you will press upload image to make it appear in Creative Studio. Notice that it tells you what type of file your image should be in (.png, .jpg, or .svg)

Once your image is uploaded, click the image so that it appears on the blank canvas like this:

Here you will need to resize the image to whatever dimensions you want. You can toggle between inches and mm using the tool on the right hand side.


When you have your images properly sized and positioned on the page, click print in the upper right corner to bring you to the print settings screen.

In this step, you will adjust the page size, product, paper, and color mode all depending on what paper you are using and what blank you are pressing on. For this example, we used our HTW Paper and are pressing onto a polyester shirt, so we switched those settings to these:
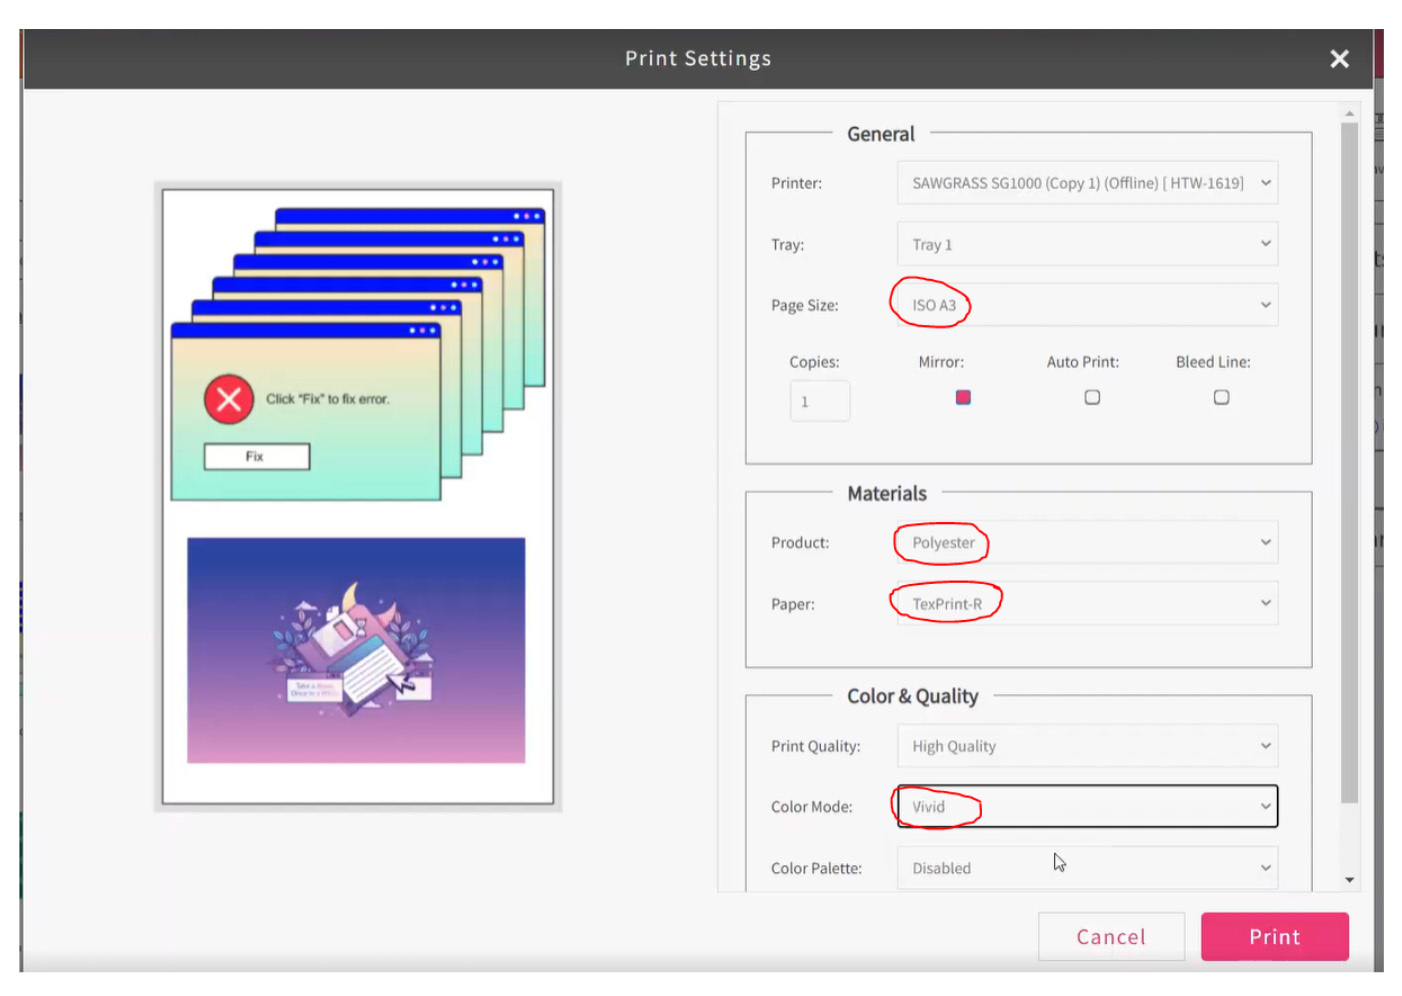
Double check to make sure “Mirror” is selected (it should be automatically) and then press print in the bottom right corner to open Print Manager:
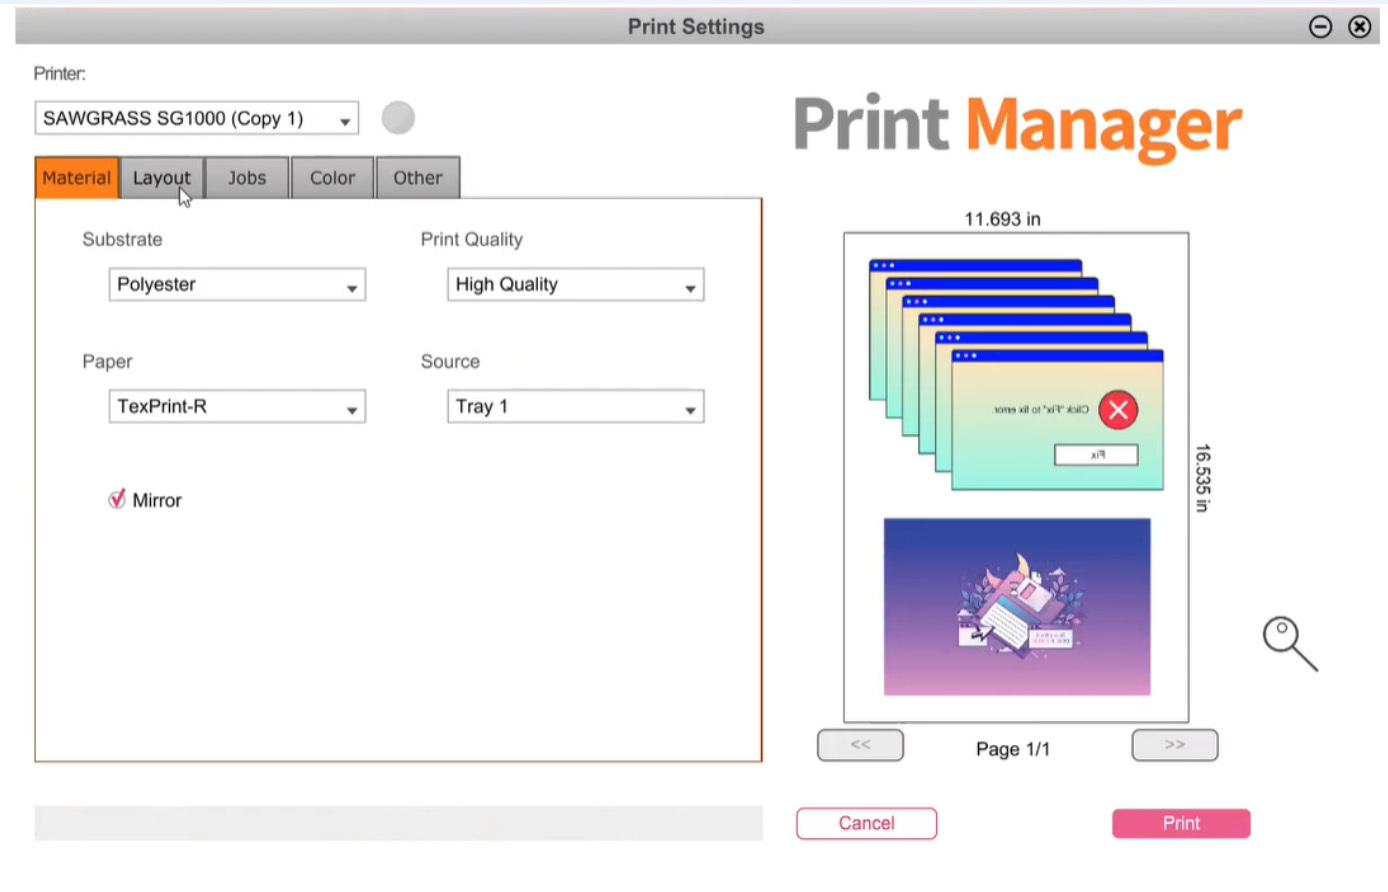
In Print Manager, double check to make sure the Substrate and Paper are correct, and that Mirror is checked. Under the “Jobs” tab, you can adjust the width, height, and number of copies if you need to.

Once you are satisfied with the print settings, click the pink “Print” button on the bottom right to send this to the printer and voila! You have just printed a sublimation transfer using your Sawgrass SG1000.

Pressing instructions will be different for every blank, so pay attention to application instructions for your specific blank.
Sublimation is so versatile and is an asset to anyone in the decorating and customization industry! From drinkware to shirts, there is something for everyone! For more information on sublimation and using the Sawgrass SG1000, check out these blogs " What is Dye Sublimation", "Sublimation Ink Buyer's Guide", and this video: