For those of you who are new to using Heat Transfer Vinyl, we understand the overwhelming struggles of getting your first vinyl cutting machine! There are so many questions that you may be looking answers for! How do you set it up? How do you use it?
The Cricut Maker is a great beginner machine to cut all of our vinyl! In this blog, we are going to walk you through how to set up your Cricut Maker and show you how to begin your first cut using Heat Transfer Vinyl!
Setting Up Cricut Maker
1) To begin, you will receive a Cricut Maker Welcome Book manual. Within the first page of this book, it directs you to follow their online guide. Visit: https://design.cricut.com/setup and follow the steps! You will see that the machine includes sample materials to create a simple card. During the setup process, this intro project is optional.
2) The Cricut website is an overall super helpful resource for setting up your Cricut Maker! For FAQ, Manuals and Videos, and Setup and Troubleshooting, visit: https://help.cricut.com/hc/en-us.
3) To use the Cricut Maker, you will need to download the Cricut Design Space software, which where all your designs will need to be created. Again, the Cricut website is super helpful for downloading this software. Visit: https://help.cricut.com/hc/en-us/articles/360020584314-Design-Space-for-Desktop-Installation-Instructions- for easy step-by-step instructions to download this software for a PC/MAC, IOS Device, or even and Android Device. Also, the Cricut Design Space software is FREE!
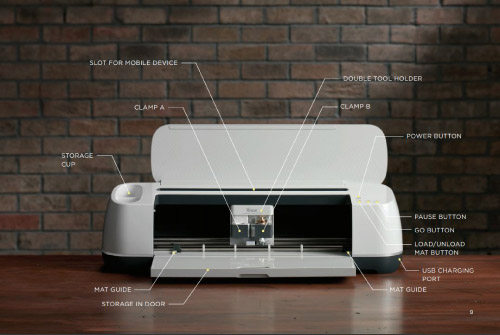
4) Now, let’s take a closer look at the actual components of the machine.
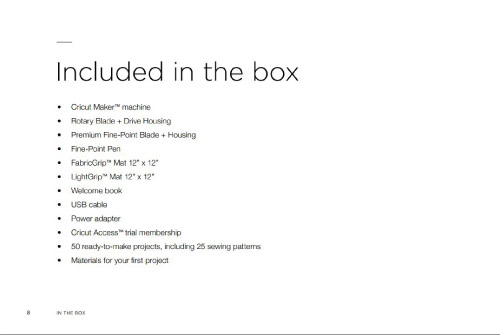
5) Below, you will find the list of what’s included in the box.
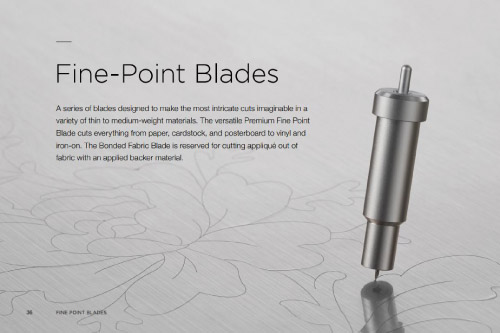
6) The Premium Fine Point Blade is the blade that you will want to use for cutting Heat Transfer Vinyl, and even Adhesive Vinyl. Luckily, this blade comes pre-installed in the machine (located in Clamp B)! However, if you ever wish to change the blade, you can refer to page 46 of the Welcome Book manual.
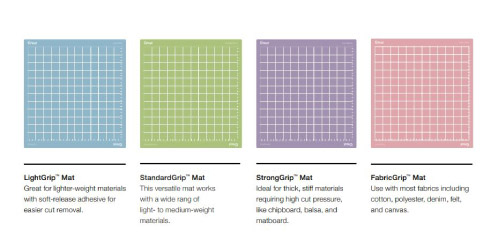
7) When you are cutting vinyl with your machine, you will want to ensure that you are using a cutting mat. As noted on page 40 of the Welcome Book manual, these mats are reusable adhesive cutting mats, and each mat is formulated to ensure the best possible adhesion and the longest possible life. The Cricut Maker includes both the LightGrip and FabricGrip Mat. To start, you can use your LightGrip Mat (we will show you how to use this below). Although the LightGrip Mat works well standard vinyl, the StandardGrip and StrongGrip Mats can also be used with vinyl and can be Purchased Here!
Cutting HTV with the Cricut Maker
1) As noted above, in order to cut a design with the Cricut Maker, you must first make or upload your design within the Cricut Design Space software.
2) For this example, we are going to show you how to upload an image which will be cut.
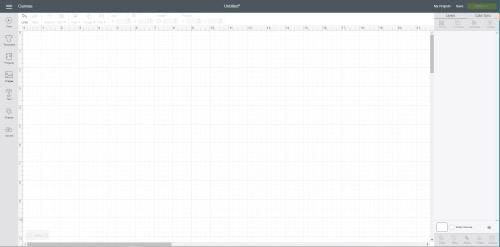
3) To begin, you will want to click on the upload button, which is the lowest button on the left-hand side when you first open Cricut Design Space.
4) Follow the steps to choose a saved image on your computer.
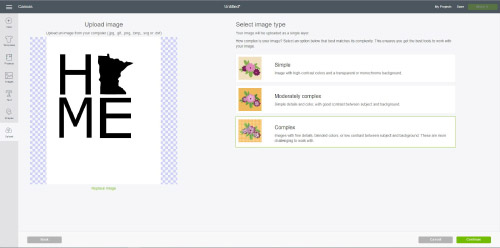
5) When you get to this step, you must Select image type. It seems to never hurt to just choose Complex!
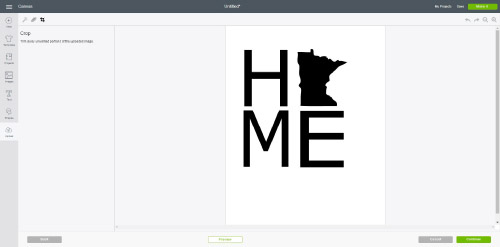
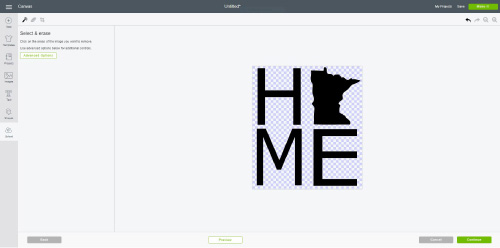
6) Now, you must realize that Cricut Design Space does not yet recognize any cut lines on the image. In this example, we have the black image on the white background. Cricut Design Space sees this black and white as all one image, and does not understand that we want to simply cut around the black. On this screen, you will see that you have 3 options to briefly edit your image. You can Select and erase, Erase, and Crop. You will want to choose Select and erase and then click on any white space within the image.
7) You will then notice that the white background has been fully deleted. Cricut Design Space now will recognize that we want to cut around the black image.
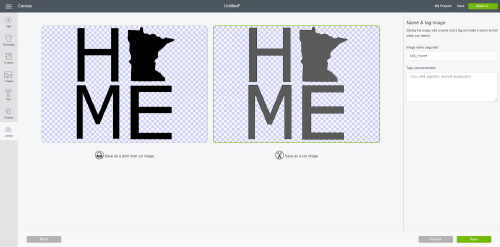
8) When you come to this screen, make sure to Save as a cut image! We are not printing anything, just cutting.
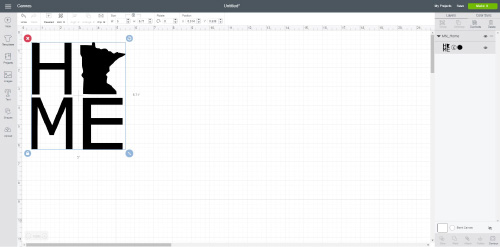
9) After saving your newly-created image, Cricut Design Space will show all of your recently uploaded images here. The most recent one will be on the top left, so select that image and then click on Insert Images in the lower left-hand corner.
10) Once the image has been inserted, you can resize it or do anything to your liking in which Cricut Design Space is capable of. When you are ready to cut your image, click Make It in the upper right-hand corner.
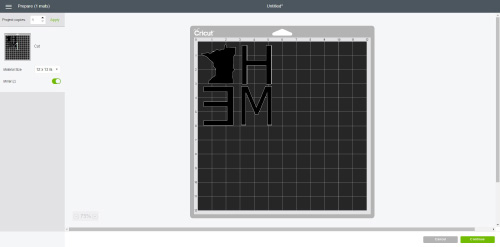
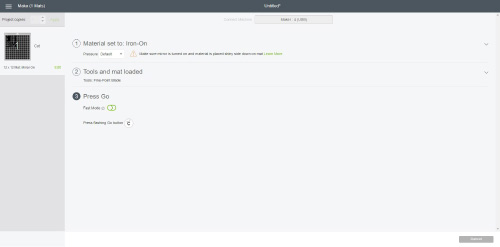
11) Once you click Make It, Cricut Design Space is really nice in how it walks you through the steps on how to begin cutting. You will see that it shows the image on the gridded cutting mat. You must choose your material size - you just need to select the size of your cutting mat (assuming your vinyl fits fully on your cutting mat)! Then keep in mind that Heat Transfer Vinyl is always cut in reverse (mirror image). You will see that there is even a button to select Mirror (and it will show the image mirrored on the cutting mat)! Click Continue when you are ready to proceed.
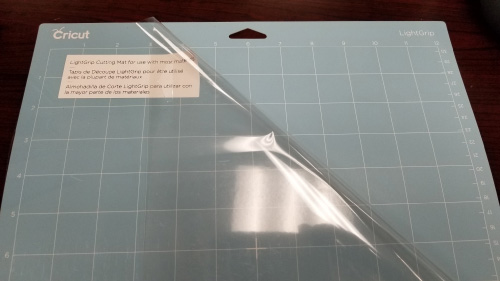
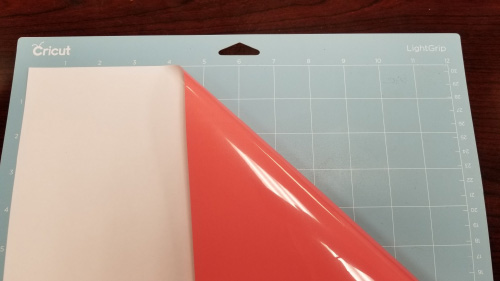
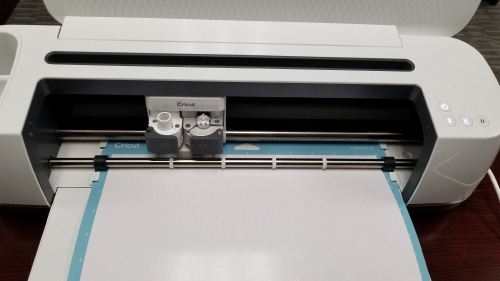
12) For this example, we are using Siser EasyWeed in the Hibiscus/Coral color. As mentioned above, the LightGrip Mat works well with standard Heat Transfer Vinyl! To use the cutting mat, begin by removing the plastic covering (but save this to protect it while not in use). Then, carefully place your vinyl liner side down on the cutting mat so that it is aligned straight.
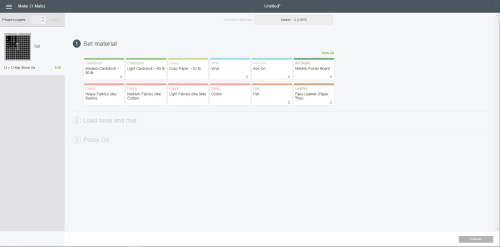
13) Once you have your vinyl ready on your cutting mat, proceed to follow the steps on Cricut Design Space. You will need to select the Set material for the Heat Transfer Vinyl in which you are using. As noted under the Application Instructions tab for Siser EasyWeed, the Set material for this vinyl is Iron-On.
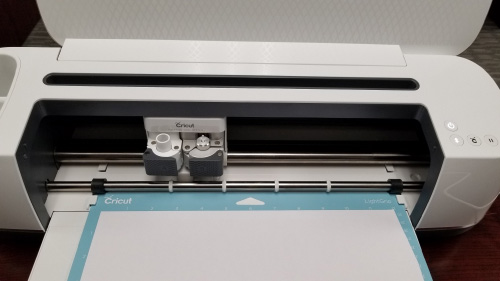
14) Also as noted under the Application Instructions tab for Siser EasyWeed, the pressure is Default. When the Cricut Maker is ready for you to load the cutting mat, you will notice that there is a blinking light on the machine. Align the cutting mat into the machine and press the blinking button. This will feed the cutting mat fully into the machine!
- Once the cutting mat in loaded into the machine, you will see another blinking light on the machine indicating that the machine is ready to cut the vinyl. Click this to begin the cutting process!

 Custom Printed Apparel
 Custom DTF Apparel
 Embroidered Apparel
 Full Service Customization
 Rhinestone Apparel
 Sublimated Apparel
 Custom Drinkware/Photo Panels
 Siser Sanmar Decoration
 Seasonal Items
 DTF Transfers
 Supacolor Transfers
 Sublimation Transfers
 Rhinestone Transfers
 HTV Transfers
 Custom Patches, Stickers, & Magnets
 Custom Screen Print Transfers
 Artwork & Services
 Custom Banners