
Mother’s Day is a time to show appreciation to the motherly figures in your life. Whether that be through spending time with them, or putting thought into a personal gift they will love, you can’t go wrong. Some of the best gifts to show your mom that you care are the handmade gifts you made yourself! We now offer bundles specifically with this thought in mind. Today we will go through the steps of decorating an apron, potholder, and oven mitt that will be perfect for a mom who loves baking!!
Products Used:
Mom’s Kitchen Cooking SVG Bundle
Steps
Step 1.
Cut your vinyl using a vinyl cutter of your choice. Remember to mirror the design in your design software. If you are using a Cricut cutter, you will want to attach your design together before cutting. For more tips on using a Cricut cutter and Cricut Design Space, check out this blog "How to Cut HTV on Cricut Using Cricut Design Space“.

Step 2.
Weed out the excess vinyl from your sheet. We will typically trim our sheet before weeding so we can save the scraps for future projects.

Apron:
Step 3.
We decorated our apron first, so we warmed up our heat press to 305 F and did a 10 second pre-press of it to smooth out any wrinkles and remove moisture. Then we lined up the first layer of the “Mom’s Kitchen” design, the Brown Easyweed. We pressed this layer for a one second tack, then peeled the liner off to reveal the pressed layer!

Step 4.
- After we pressed our first layer, we lined up the second layer, Easyweed Pink. We pressed this for 10 seconds total because it was our last layer of HTV. If you don’t have an upper platen cover like we do, you will want to use a heat press sheet to protect the layer of HTV that is already on the apron. Once the time was done, we peeled the liner and the apron was done!

Pot Holder
Step 5.
For the pot holder, our first layer was the Mint Easyweed. We centered our design, then pressed it for a 1 second tack. Then, we peeled off the liner!

Step 6.
Next, we lined up our second layer of this design, Easyweed Pink. We made sure the design matched what we saw on the webpage and then we pressed for a 1 second tack. After that, we peeled off the liner.

Step 7.
The third and final layer was Silver Easyweed. For this layer, we lined it up with the other two layers that were already pressed. Then, we pressed it for 10 seconds. When the 10 seconds finished, we peeled the liner and the pot holder was finished.

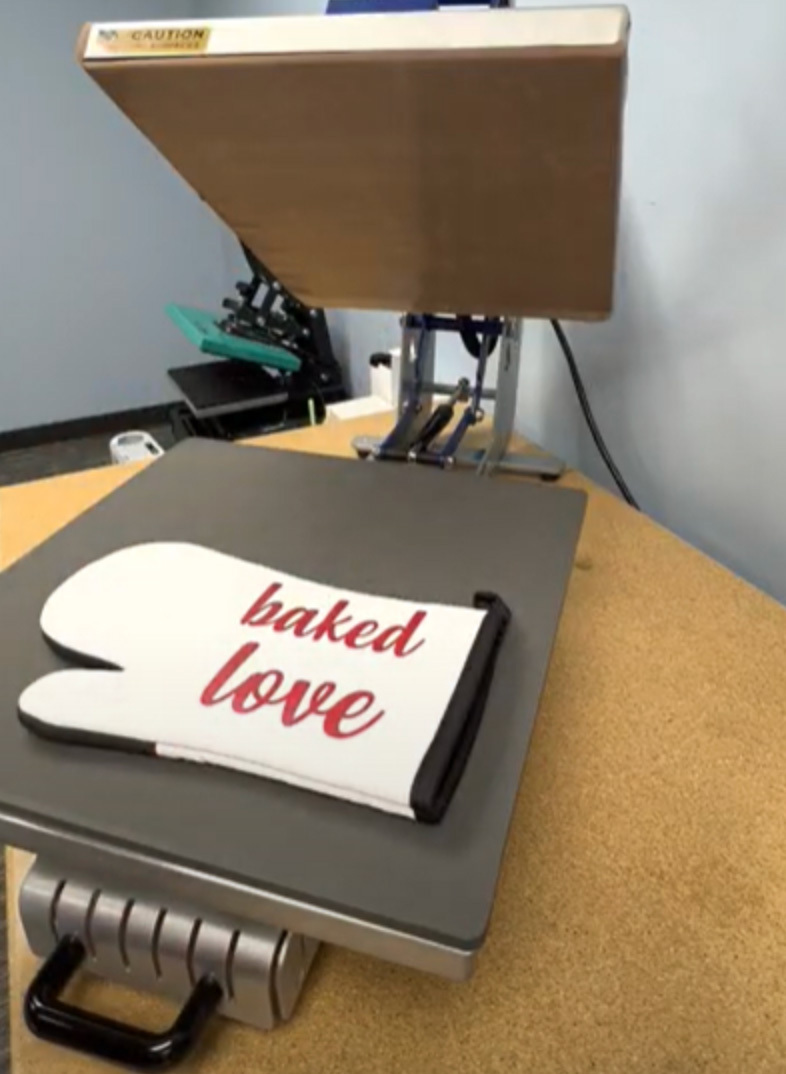
Oven Mitt
Step 8.
The oven mitt was quite a bit thicker than the two previous blanks, so we adjusted the pressure on our press so it would fit. Then we lined up our first layer of HTV, Siser Easyweed Red. We pressed this layer for a 1 second tack. Then we peeled our liner.
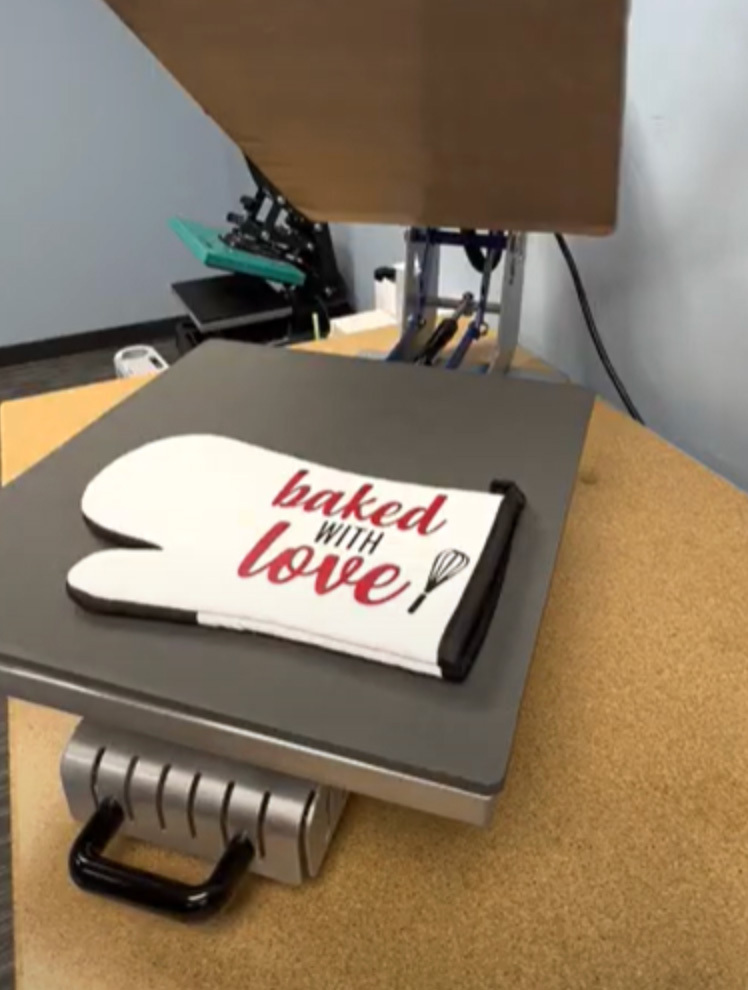
Step 9.
After the first layer, we lined up our second layer of HTV, Siser Easyweed Black. We pressed this for a 1 second tack. After the tack, we removed the liner.
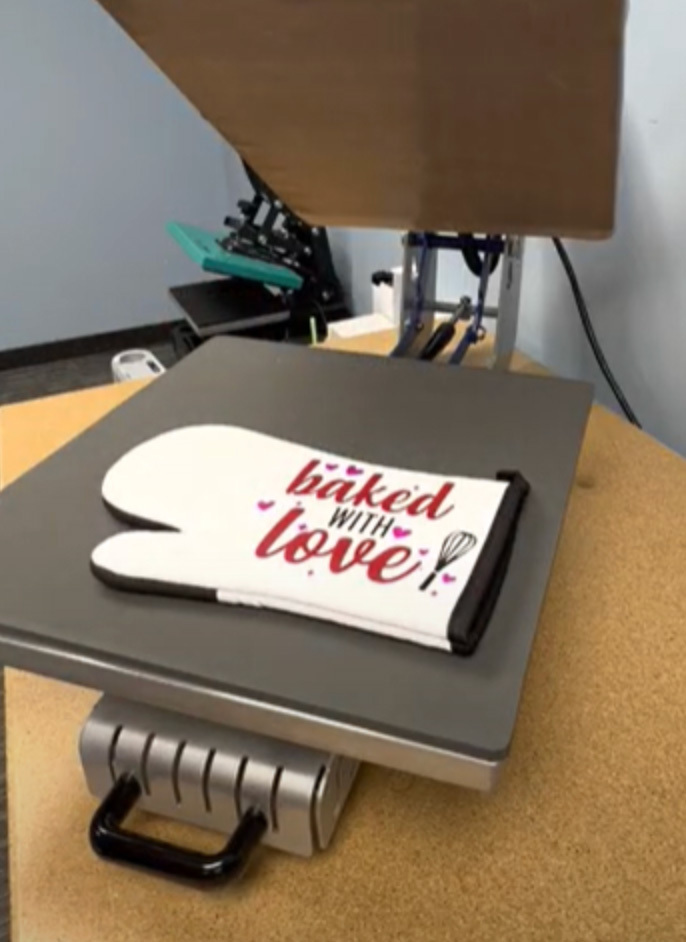
Step 10.
For the third and final layer of vinyl, we used Siser Easyweed Pink. We pressed this layer for the full 10 seconds. Once the 10 seconds finished, we peeled the liner to reveal the three fully pressed layers of HTV.
Final Results
Here is how all of the blanks turned out!
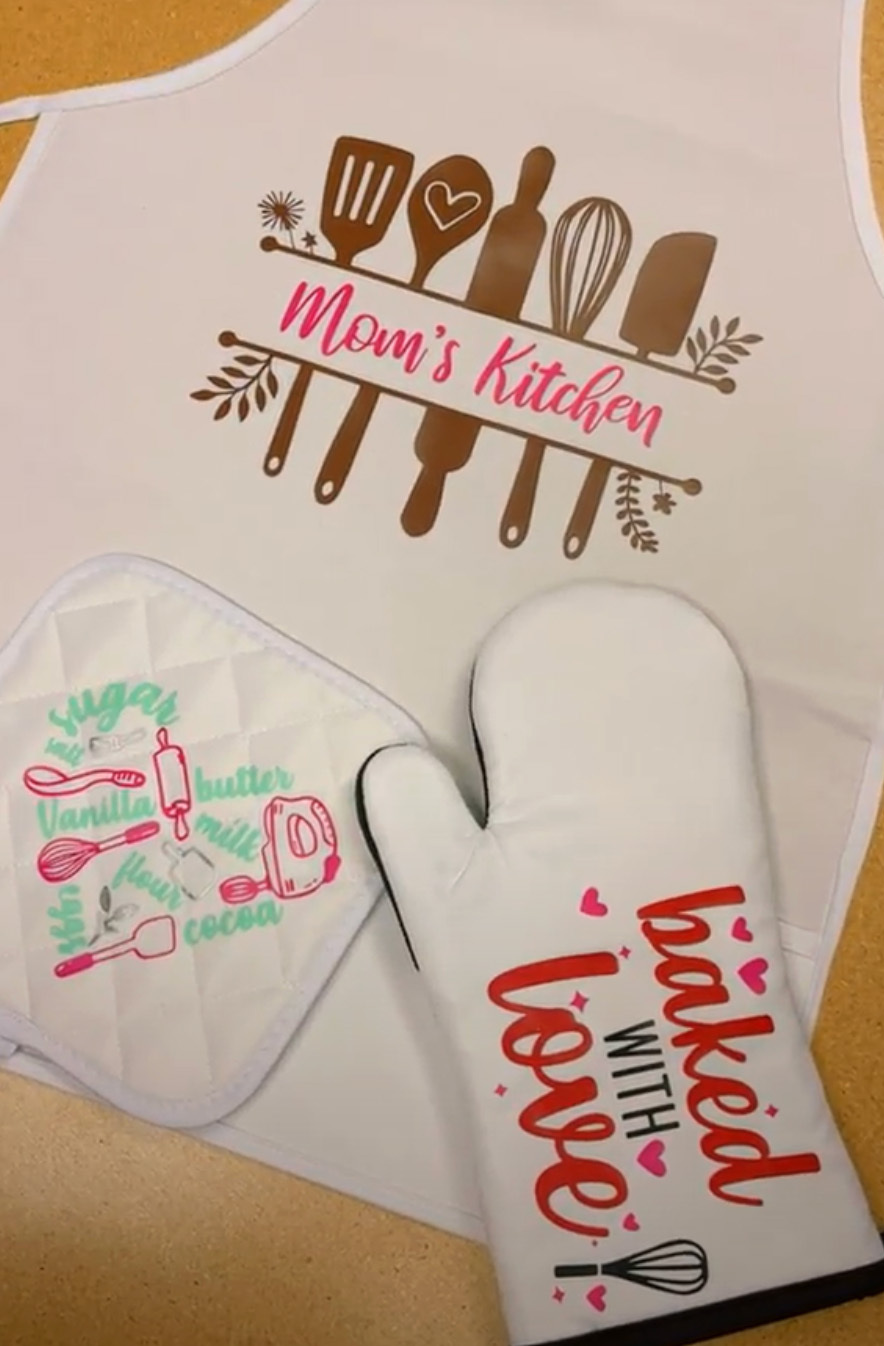
Any of these would be the perfect gift for Mother’s Day, or even a gift for yourself or someone you love, any time of the year! For more information about vinyl pressing instructions, check out our blog “HTV Time and Temperature Guide“. To watch the video of us making this design, check out our Instagram page.