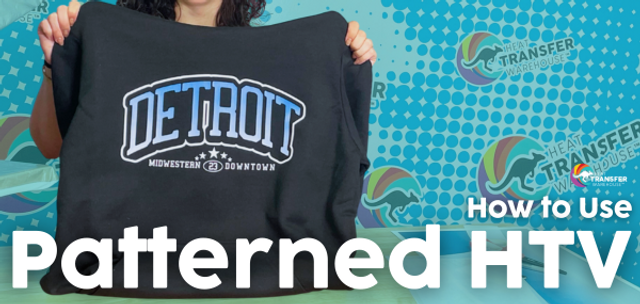
Looking to add bold, full-color prints to your next HTV project? Patterned heat transfer vinyl (HTV) is a fantastic way to make your apparel stand out—whether you’re personalizing a sweatshirt, creating a unique team shirt, or building product lines for your business.
Today, we’ll walk you through what patterned HTV is, how it differs from regular HTV, and exactly how to use it to create professional, polished designs. We’ll be highlighting one of our most popular styles: ombre patterns, perfect for holidays, teams, and more!
What Is Patterned HTV?
Patterned HTV works just like traditional heat transfer vinyl—but with one major difference: it comes pre-printed with full-color designs. Think florals, camouflage, ombre fades, team colors, or even seasonal prints.
Because the patterns are printed directly onto the vinyl surface, the adhesive is on the liner side rather than the top like standard HTV. This means you'll need to follow a slightly different application process—but don’t worry, it's super easy once you know how.
At Heat Transfer Warehouse, we offer hundreds of patterns and are constantly adding more. Whether you're looking for trendy, bold, or classic styles, we’ve got something to fit every aesthetic.
What You'll Need
- Patterned HTV
- KTM mask
- Squeegee
- Heat press
- Garment of your choice
- Weeding tools

How to Use Patterned HTV
1. Cut Your Design
- Load the patterned HTV pattern-side up.
- Cut your artwork right-reading (do not mirror).
- Weed the design just like you would with standard HTV.


2. Mask the Design
Because the adhesive is on the liner side, you’ll need to use a high tack mask to lift your cut design off the backing.
Use the “taco method”: Hold the high tack mask in a curved “taco” shape, let the middle touch the design first, then roll the sides down. This helps avoid bubbles and creases.

Avoid using your hands to press the mask down—use a squeegee for even pressure. Start in the center and squeegee outward in smooth motions.

Flip it over, remove the milky white liner, and you’re ready to press.
? Not ready to press yet? Leave the liner on and store your transfer flat for later use.

3. Press Your Patterned HTV
Patterned HTV is printed on low-temp vinyl, making it suitable for a wide range of fabrics, including nylon.
First, we’ll press the first part of our design, an outline to go around our patterned HTV.

Next, we’ll press our patterned HTV. You can peel the mask warm and even reuse it on other patterned HTV!

Finished Project

Once pressed and peeled, you’re left with a vibrant, full-color design that has a smooth finish and professional look. Ombre patterns, in particular, offer a subtle color gradient that adds dimension without any layering.
This method is great for:
- Custom apparel
- Spirit wear
- Holiday designs
- Business branding
Ready to Try It?
Patterned HTV is an easy way to take your vinyl projects to the next level. Explore our full range of over 1,000 patterns—or try custom pattern printing for your brand or client work.
Check out our patterned HTV options here:
- Ombre HTV (link text to product listing please: https://www.heattransferwarehouse.com/ombre-htv-patterns/)
- Patterned HTV (link text to product listing please: https://www.heattransferwarehouse.com/patterned-htv-vinyl/)
- Custom Patterned HTV (link text to product listing please: https://www.heattransferwarehouse.com/custom-digital-heat-transfers-patterns/)

