
Rhinestones are an easy way to add shine and dimension to your apparel. With the right heat and pressure, rhinestone transfers can be applied quickly and securely. Follow these three simple steps for a clean, professional finish.
Supplies
- Rhinestone transfer
- Heat press
- Garment (cotton, polyester, and blends work best!)
3 Easy Steps to Press Rhinestones
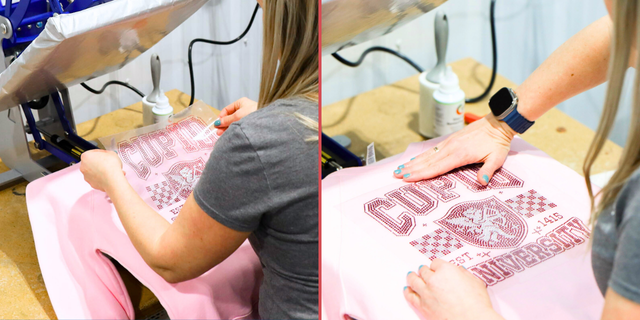
Step 1: Place the Transfer
Position the rhinestone transfer on your garment where you want the design to appear. Make sure it is straight and properly aligned before pressing.
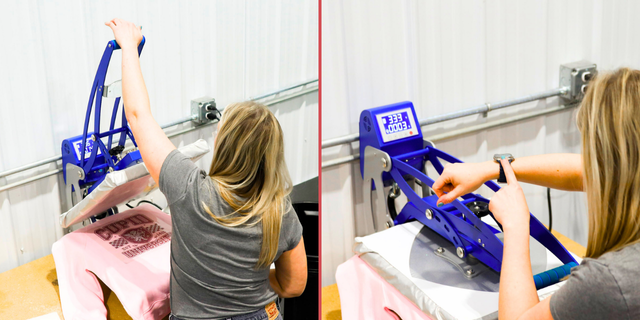
Step 2: Heat Press
Using firm, even pressure, press the transfer at 335°F for 10–15 seconds, or according to the recommended application instructions for your transfer.
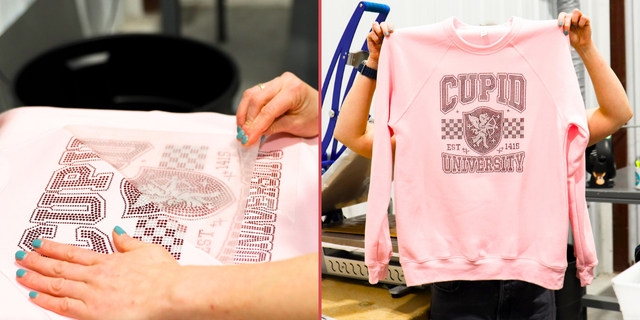
Step 3: Cold Peel
Allow the transfer to cool completely to room temperature. Once cooled, carefully peel away the carrier sheet to reveal your finished design.
Helpful Tips & Troubleshooting
- If any stones shift out of place, use tweezers to reposition them before pressing.
- When pressing near seams, zippers, or thick areas, use a pressing pillow to help achieve even pressure.
- Rhinestones can be paired with heat transfer vinyl (HTV) and direct-to-film (DTF) transfers, but avoid layering rhinestones on top of the other medium to ensure proper adhesion.
Rhinestones add bold sparkle and professional appeal to garments, making them stand out and increasing their perceived value. With just three easy steps, you can achieve long-lasting, eye-catching results.
Ready to Get Started?
Order custom rhinestone transfers to create a design that’s uniquely yours, or browse our stock rhinestone designs for ready-to-press options. Add some sparkle to your next project today! ✨