Designing Artwork for Supacolor using Canva
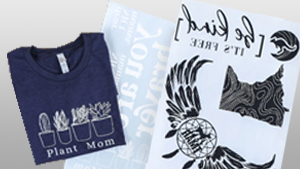
Supacolor is an amazing option for custom transfers. They have everything you could need like clothing or promotional transfers for tote bags, coolers, lanyards, you name it! The part of the Supacolor process that might be the most confusing is designing your artwork. In this blog we are going to talk about designing artwork for Supacolor using Canva!

Using Canva for Supacolor artwork

Canva is a great FREE resource for designing artwork, you can pay to upgrade your plan and have even more options. There are many templates to choose from when designing on Canva, but for Supacolor if you already know what size, you are going to put in the custom size of your transfer. Otherwise, using the “Instagram post” option is the easiest to design with! Once you put in the measurements of the transfer you are planning on ordering, you are good to create your artwork. There are hundreds of fonts to choose from that are free to use on Canva, along with many color options, design elements, stickers, and styles.

After creating your blank document, will see many tools on the left side of your screen. You will mainly work with text, uploads, and elements. From the “Uploads” section on the left, you can choose any artwork or images already on your device to edit.

When you are working with text, you have options like heading, subheadings, and body text. After typing the text you want, you can browse through the many font options and even search keywords like “retro” or “vintage” if you are looking for a certain mood for your font. You can also curve your text by going into effects and clicking “curve”.

When you are working with the “elements” tool, you can include almost any design element you want. Try searching for the image you have in mind like stars, clouds, coffee cup, etc. There are so many different way you can create your artwork in Canva, it is best to experiment and find what fits your personal aesthetic

Check out this video for more detailed information about designing artwork (including how to still achieve a shadow effect without it being too transparent for Supacolor!
In this video Kirsten goes over, in great detail, how to create beautiful artwork for Supacolor using Canva. She also explains resizing, downloading your file as a .png with a transparent background, and using unique effects for your design. This is a great video for people just getting started with Supacolor transfers, and can be helpful for returning users as well!
Vectorizer
Another great resource that gives you 1 free download a day is https://www.vectorizer.io/ You will need to have your artwork already created for this website, as it gives you 1 credit everyday to upload an image and turn it into a vectorized image. To do this, you will need to click “upload image.”

Once you have chosen your file, it will automatically turn into a vector image. From there, you will click download as an svg file. After that, you have created and downloaded your artwork as a vectorized svg! That means it is ready to submit to our website for proofing.
If you are more comfortable using Adobe Illustrator, we have a great video resource for creating artwork there as well. This video is more about technical aspects of the artwork, rather than actually designing art:
Supacolor is a great option for doing custom transfers in bulk. Reordering is also an option, along with many sizes to choose from! We have a great playlist of YouTube videos to answer your questions:
https://youtube.com/playlist?list=PLwBCka-0uK5jCl4psvoJWH7ajeuoIfrFd
We also recently found this Facebook group dedicated to Supacolor users:

 Custom Printed Apparel
 Custom DTF Apparel
 Embroidered Apparel
 Full Service Customization
 Rhinestone Apparel
 Sublimated Apparel
 Custom Drinkware/Photo Panels
 Siser Sanmar Decoration
 Seasonal Items
 DTF Transfers
 Supacolor Transfers
 Sublimation Transfers
 Rhinestone Transfers
 HTV Transfers
 Custom Patches, Stickers, & Magnets
 Custom Screen Print Transfers
 Artwork & Services
 Custom Banners