
Are you just getting started with your Cricut machine? Looking for help with Cricut Design Space?
This Cricut Design Space Guide is a great place to get started and learn more about how to use the program to design your projects and make the most out of any Cricut machine that you may own. Let’s walk through the menus in Cricut Design Space and the functions associated with each one.
Download & Set up Cricut Design Space
First, you will need to download and install Cricut Design Space to your device. This is a free program that controls your Cricut machine and allows you to send your designs to your machine. You can find this software here.
The following tutorial and screenshots are on the desktop Cricut application. The mobile application looks different and will not have all of the options.
About Cricut Access
There is a paid subscription called “Cricut Access” where you will get shapes, projects, images, fonts, and more to use with your Cricut right in Design Space. This is an optional subscription that some people love and others do not use. You can upload your own images and use the fonts already on your device right in Cricut Design Space for free.
Setting up a New Project
Open up Design Space and click “new project” to be taken to what is referenced as your “canvas”. On this screen, there are a variety of menus that have all of the options you need to design and make something with your Cricut.
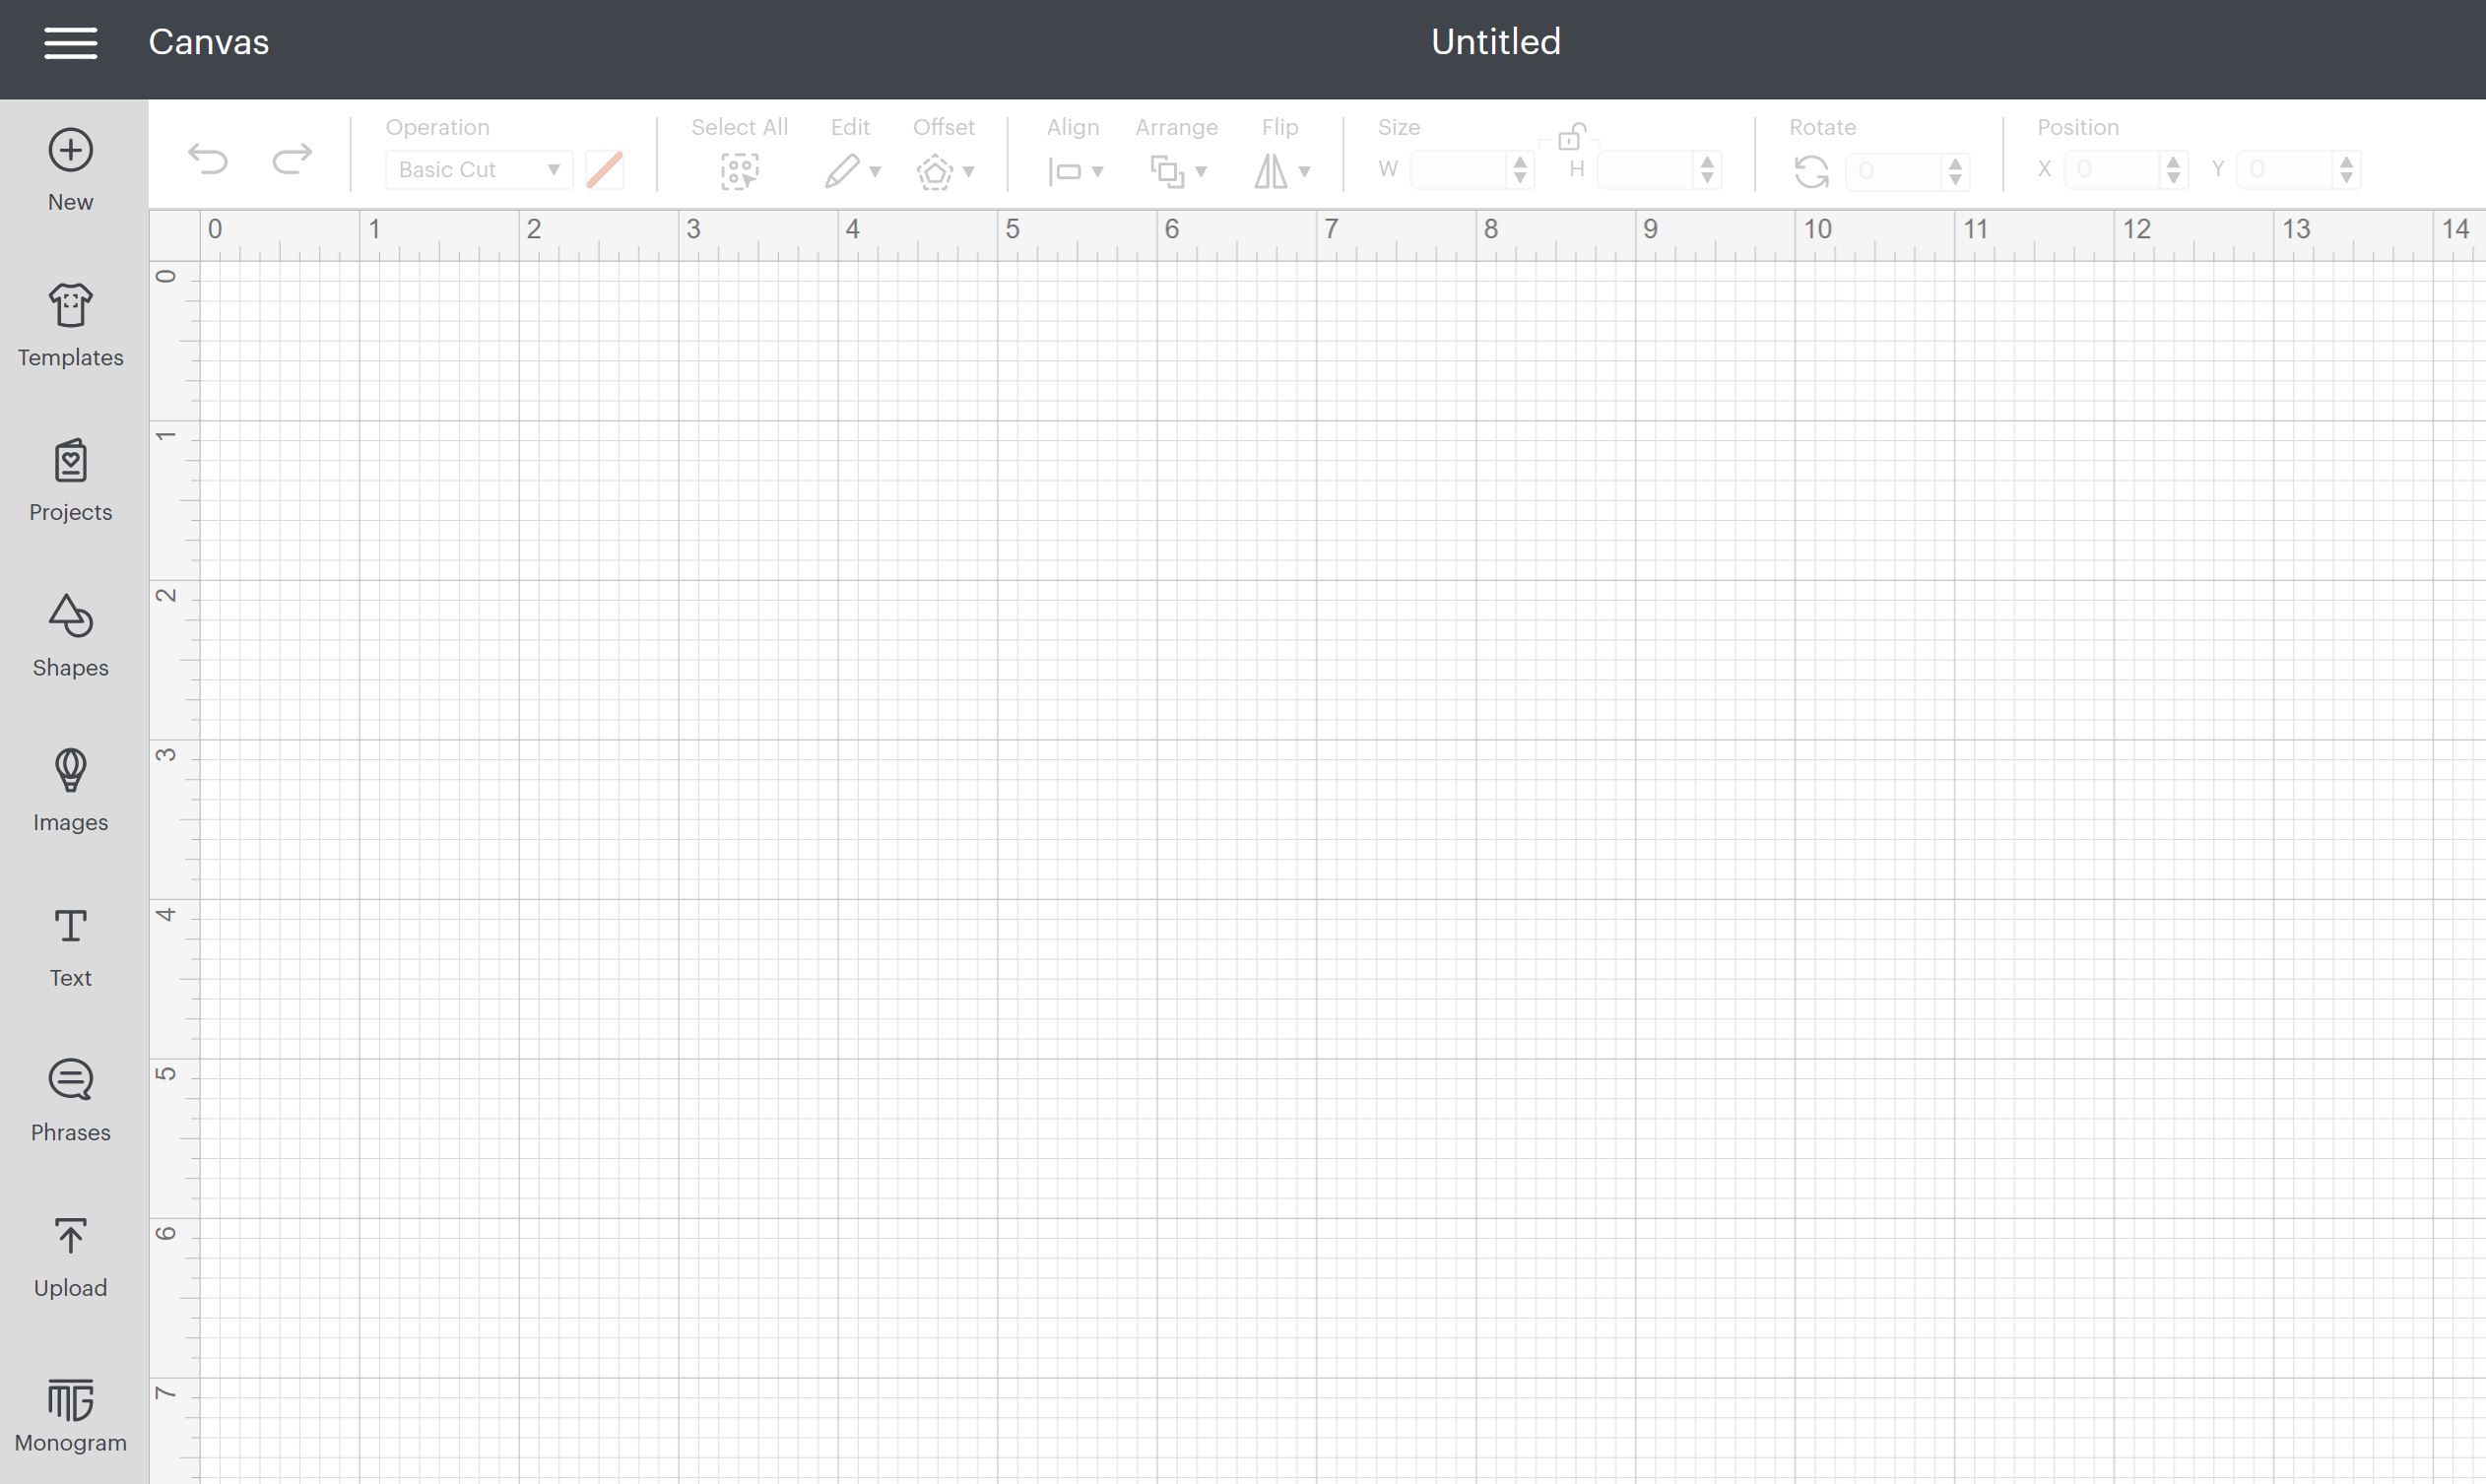
Primary Menu Tools
The menu running down the left-hand side is known as the Primary Menu. This menu is geared towards creating and adding designs to your project. It has the following options:
- New - this will create a new canvas or workspace for another project. Design Space will prompt you to save your current project before going to a new canvas.
- Templates - these are only available on a computer. Add templates in the shape of shirts, onesies, and so much more. Then use those to size your design and see how it will look on your final project.
- Projects - browse a variety of “ready-to-make” projects where all you have to do is click and start creating. Some of these are free and others require payment. Remember the Cricut Access subscription gets you access to more of these for a monthly fee.
- Shapes - use free and Cricut Access subscription shapes from this menu to make simple designs or modify designs you already have.
- Images - browse thousands of images in Design Space that can be made with your machine. Some of these are free and others require payment. Remember the Cricut Access subscription gets you access to more of these for a monthly fee.
- Text - click to start typing and adding your own text to the canvas. You can pick from Cricut fonts or those already on your computer.
- Phrases - want an easier way to sort and search for the right images for your project? You can search by phrase by clicking this button to narrow your options.
- Upload - perhaps you have a file you want to cut with your Cricut machine? Use upload to add it to your canvas.
- Monogram - want to add your initials to a project? Try the monogram maker to make a variety of initial crafts. This feature is currently for Cricut Access subscribers.
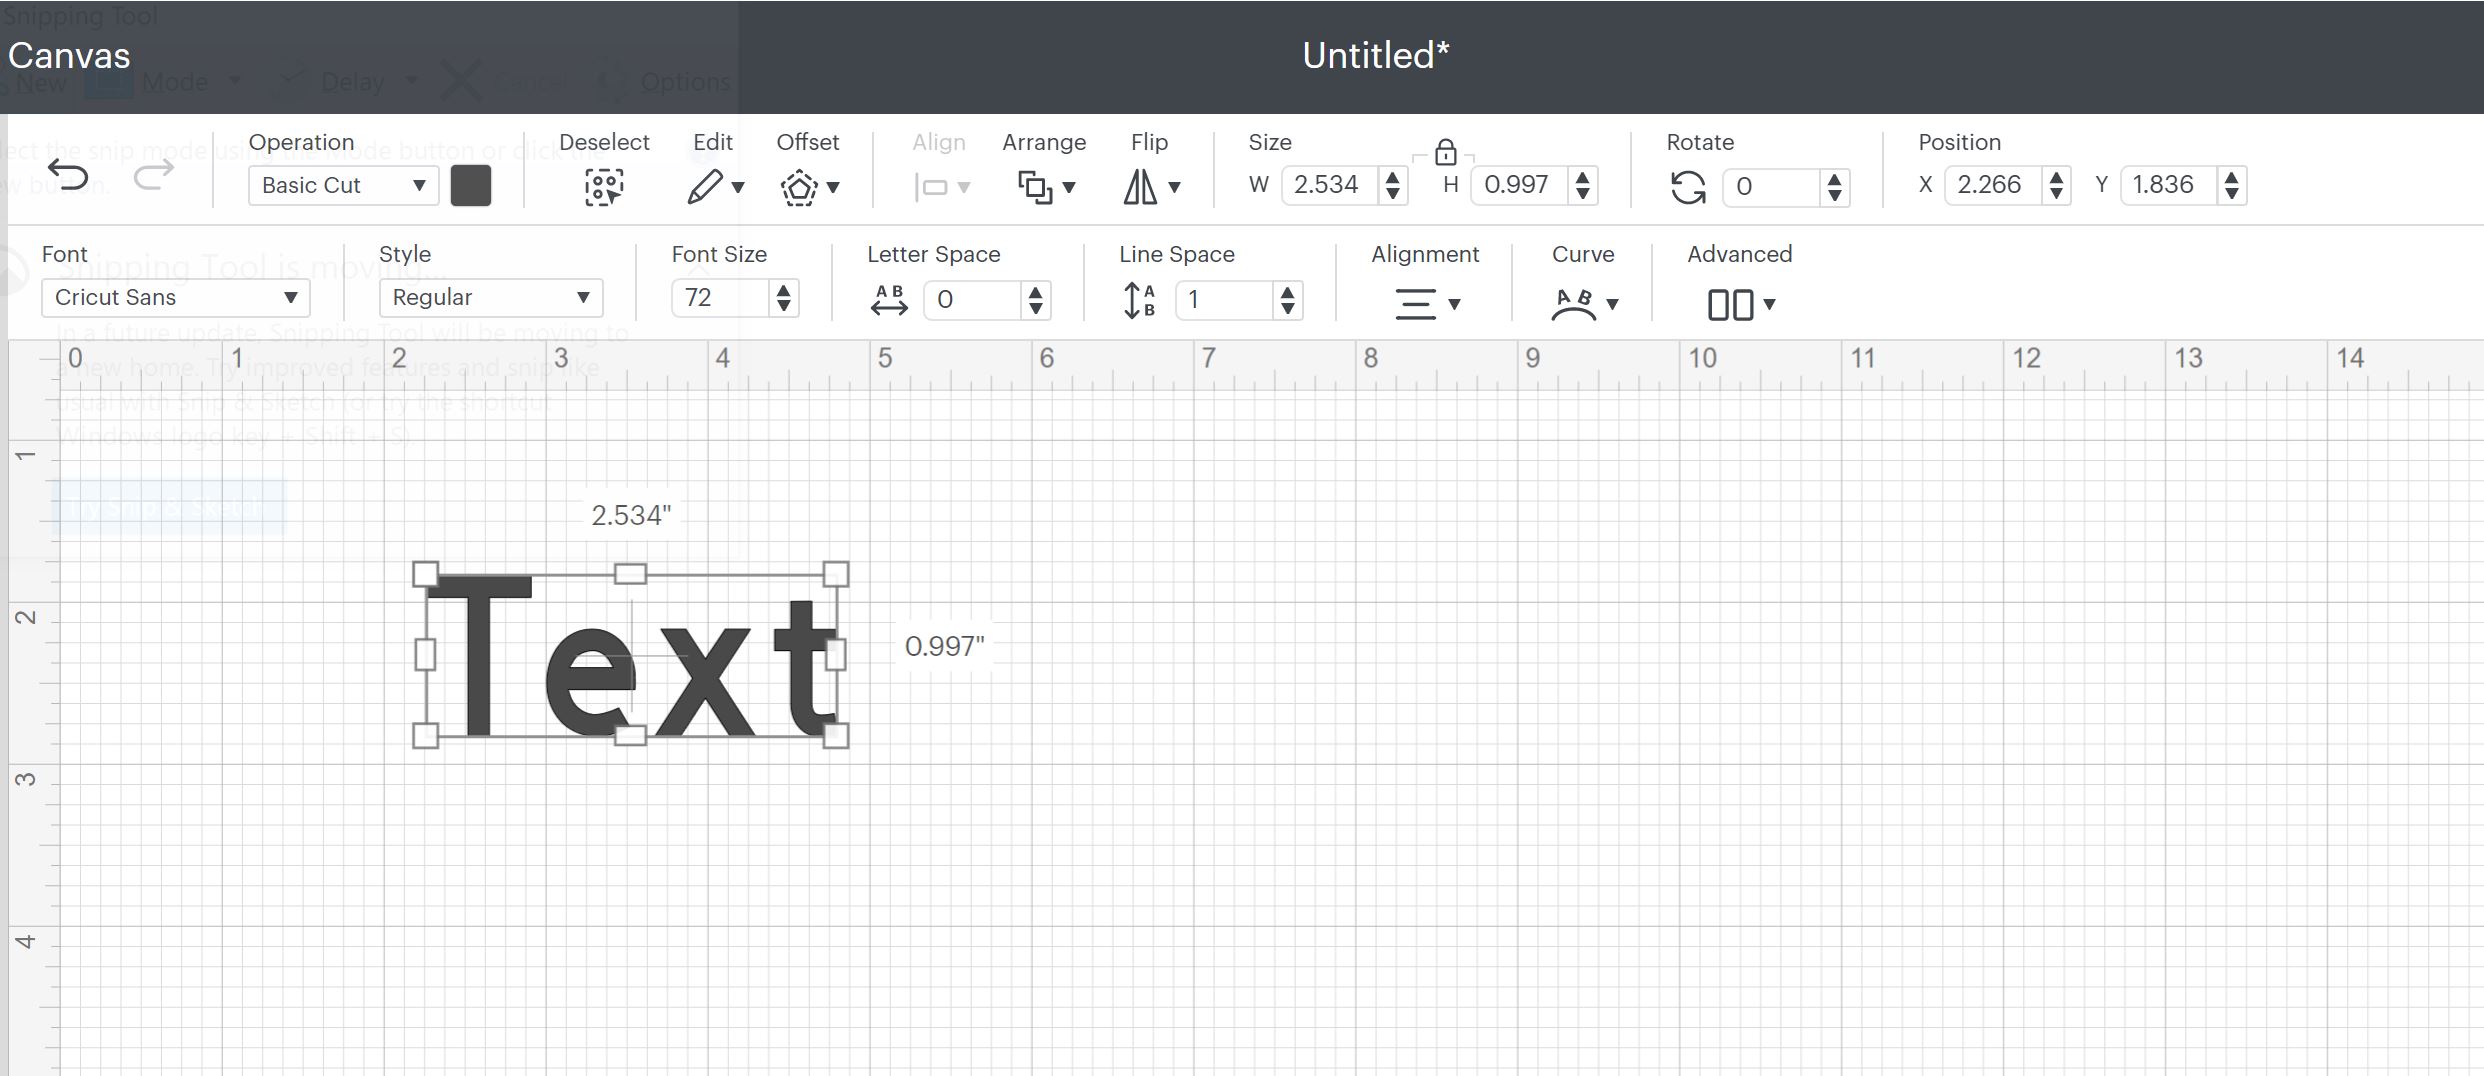
Top Menu Tools
Across the top of your screen, you will see a top menu. The menus shown in the image above will appear when you have the text chosen. These tend to feature ways to edit and modify your selected design element. Here are the options and what they do:
- Undo/Redo - undo any action you have made in Design Space or redo if you want to replace that action.
- Operation - this pull-down menu gives you the operation options for your image and machine. The options on this menu will change depending on what machine you have chosen.
- Select All - pick everything on the canvas to apply one action.
- Edit - the cut, copy, delete, duplicate, and delete functions pull down from this button.
- Offset - want to add a shape around your object that follows the lines of your object? Then offset is for you! Click this button to change different options and get different looks depending on what you want for your project.
- Align - pick two or more objects then click this button for options for alignment.
- Arrange - send objects backward or forward.
- Flip - mirror any object horizontally or vertically.
- Size - type a specific size in these boxes instead of dragging an object to resize. Note the lock button between these boxes. If that is locked, Design Space will retain the aspect ratio and not distort your object. You can also unlock this to allow distortion if you wish.
- Rotate - set a specific angle to rotate any object.
- Position - type in these boxes to specifically locate an object on the canvas. Please note that these positions do not maintain themselves once you are done and go to make your project.
Text Object Tools
Then for text objects, you will also have the following:
- Font - pull down to change the font. You can also filter the fonts on this menu by Cricut or system. System fonts are those that are on your device. There is a “kerned fonts only” checkbox on this menu. If you are missing any fonts, uncheck this box as they are probably hidden.
- Style - choose from regular, bold, bold and italic, italic, and writing. A writing font is one where you will use pens in your Cricut machine to draw the font instead of cutting it.
- Font Size - make your font larger or smaller.
- Letter Space - move the letters further apart or put them closer together.
- Line Space - for text that has more than one line, you can adjust the lines further apart or closer together.
- Alignment - align left, right, or center. You can also align within the text box under this menu and turn text wrap on or off.
- Curve - curve any text up or down with the options in this pulldown.
- Advanced - ungroup text to lines, letters, or layers. This is useful if you want to make each letter or line its own color or move each one individually.
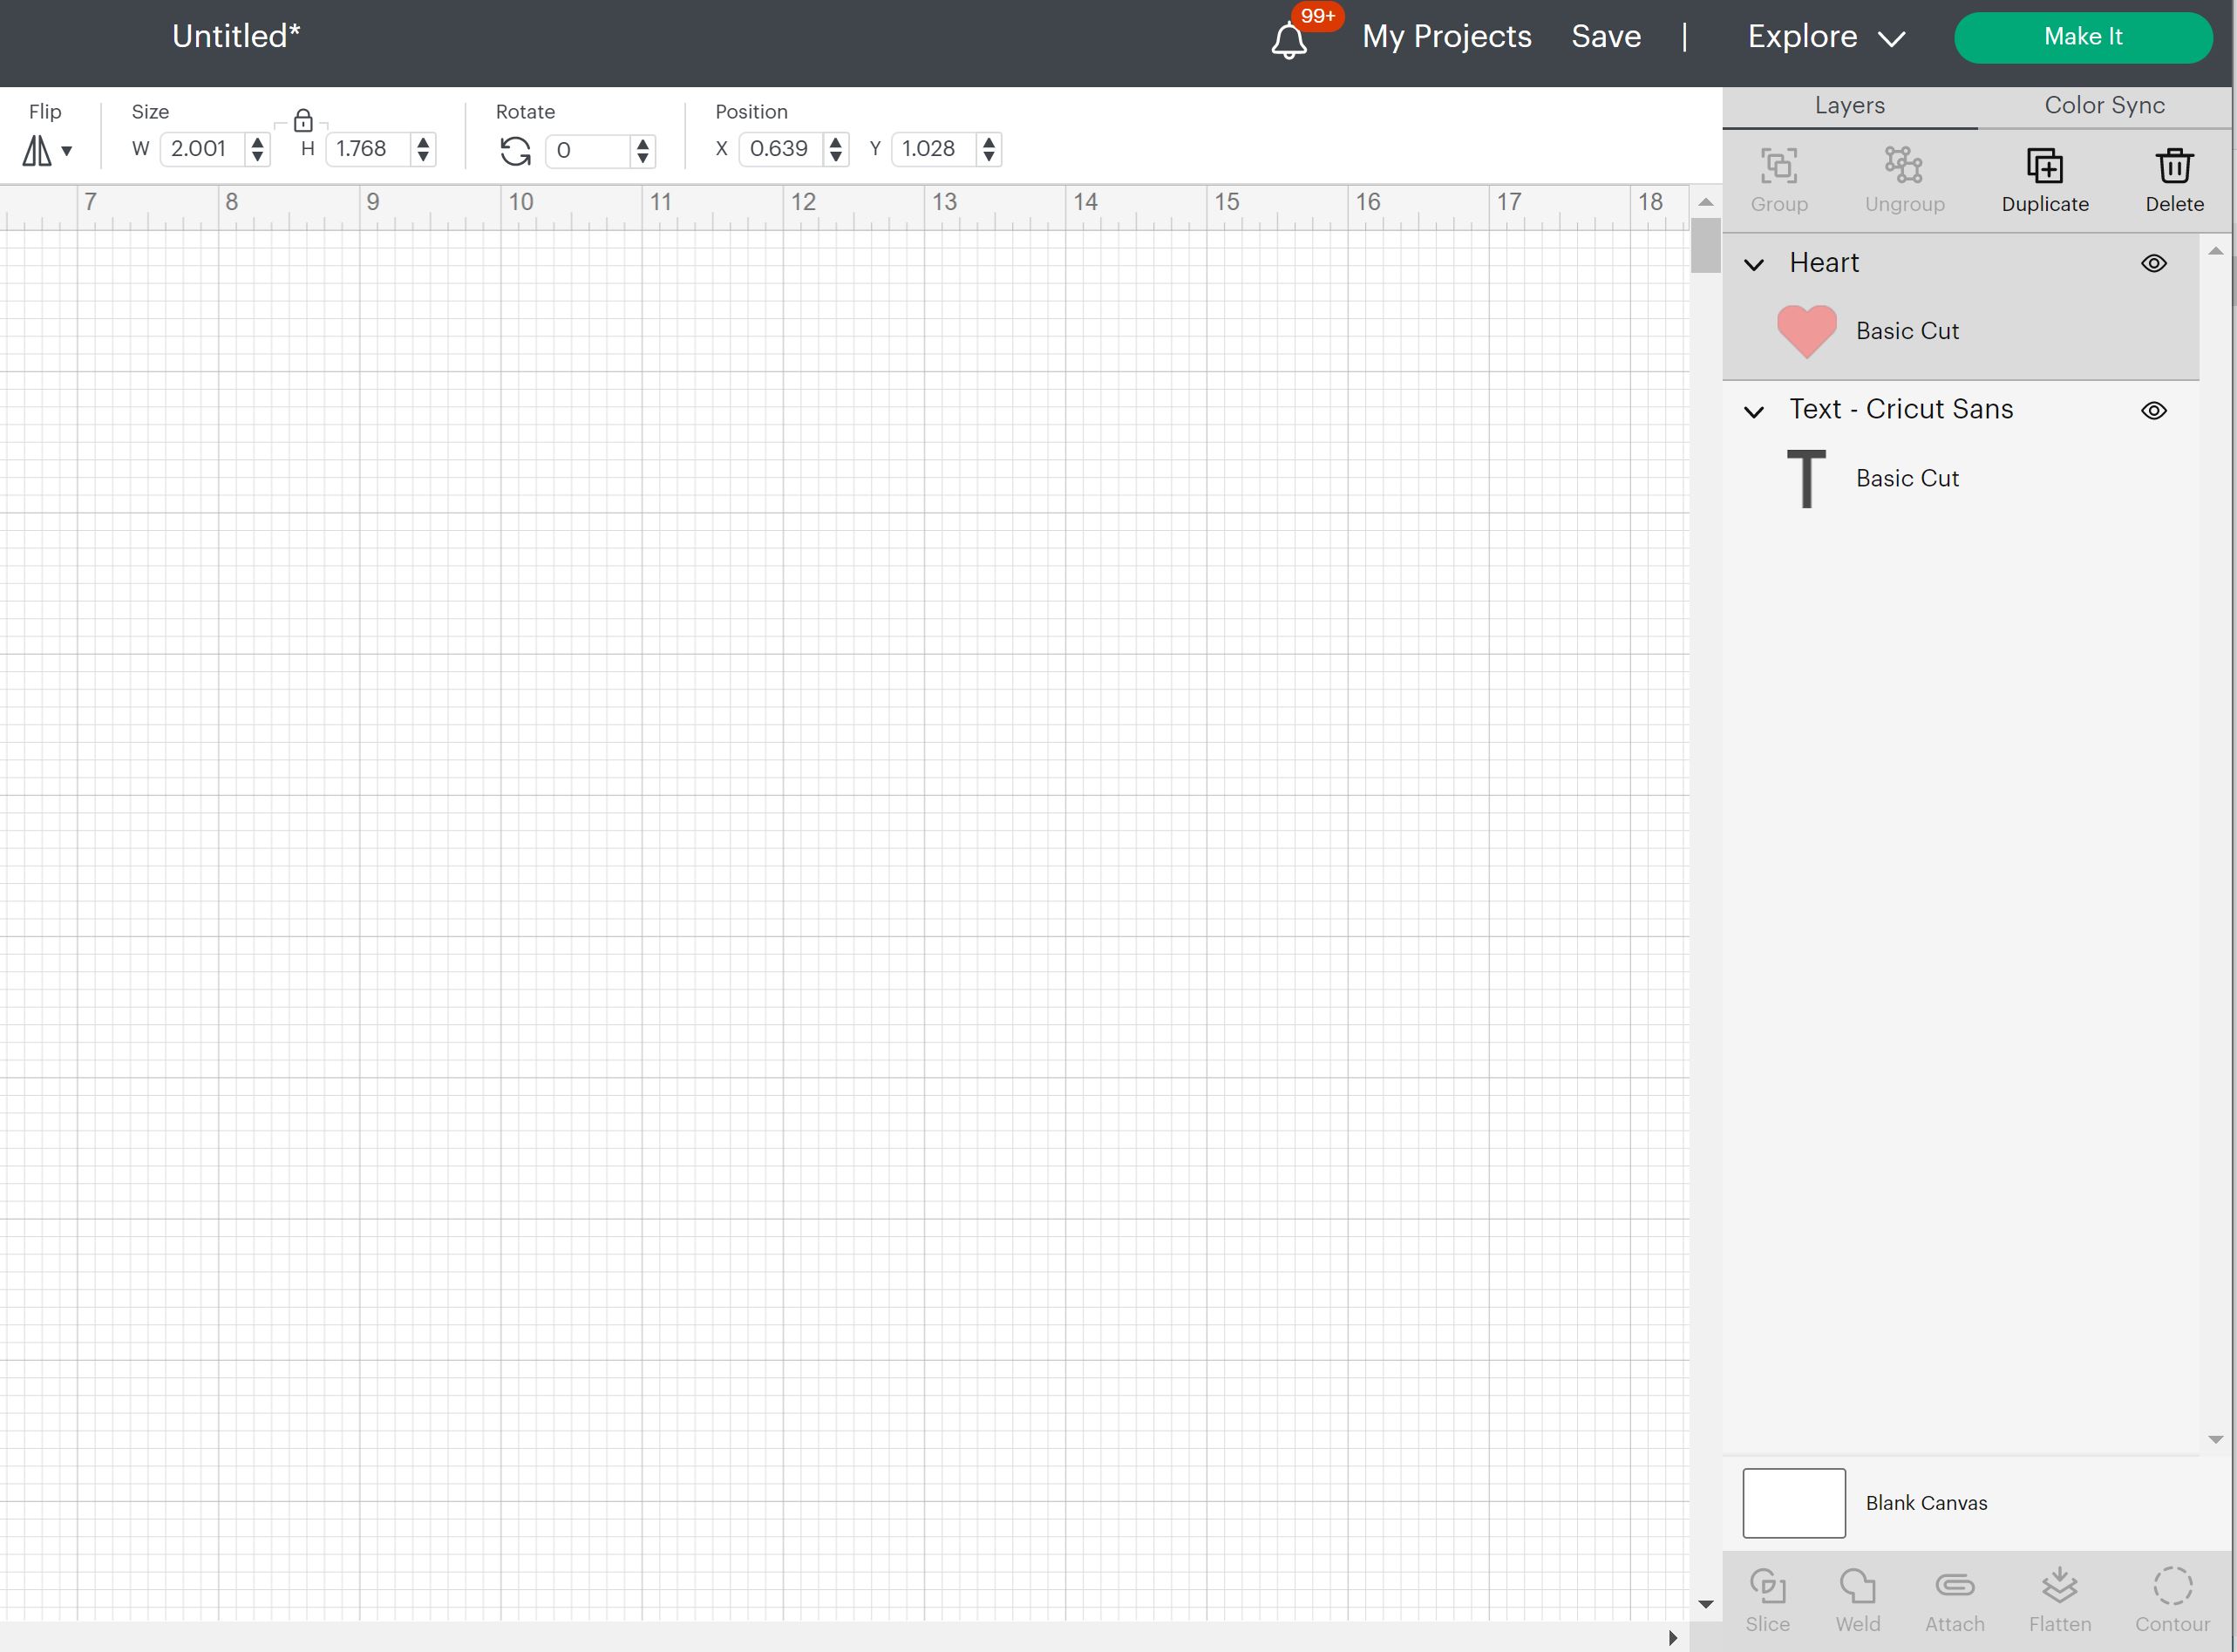
Right-Side Menu Tools
As you start designing your project and adding elements, you will see those appear as layers in the panel on the right. You will find the following options in this panel:
- Group/Ungroup - pick multiple layers to group them together. This is only to easily move them around the canvas and doesn’t link them for cutting. Use the ungroup button to release the grouping.
- Duplicate - make a copy of any object.
- Delete - permanently remove any object from the canvas.
- Color Sync - pick this tab to move objects easily to the same color. Making objects the same color will make them cut out of the same sheet of material.
- Slice - this only works when exactly two objects are highlighted. It will slice one object from the other. Use this to remove portions of images that you do not want.
- Weld - once saved, welding cannot be undone. This feature makes two or more objects into one piece.
- Attach - pick any objects you want to cut together or that you do not want to move once you click “make it” and click attach. This puts them together once you go to cut.
- Flatten - this makes any object or group of objects a print then cut which means you will send the project to your printer first then your Cricut machine will cut around it.
- Contour - use this button to remove cuts from any design. Useful for removing just a few cuts that you don’t want to make or making a project simpler.
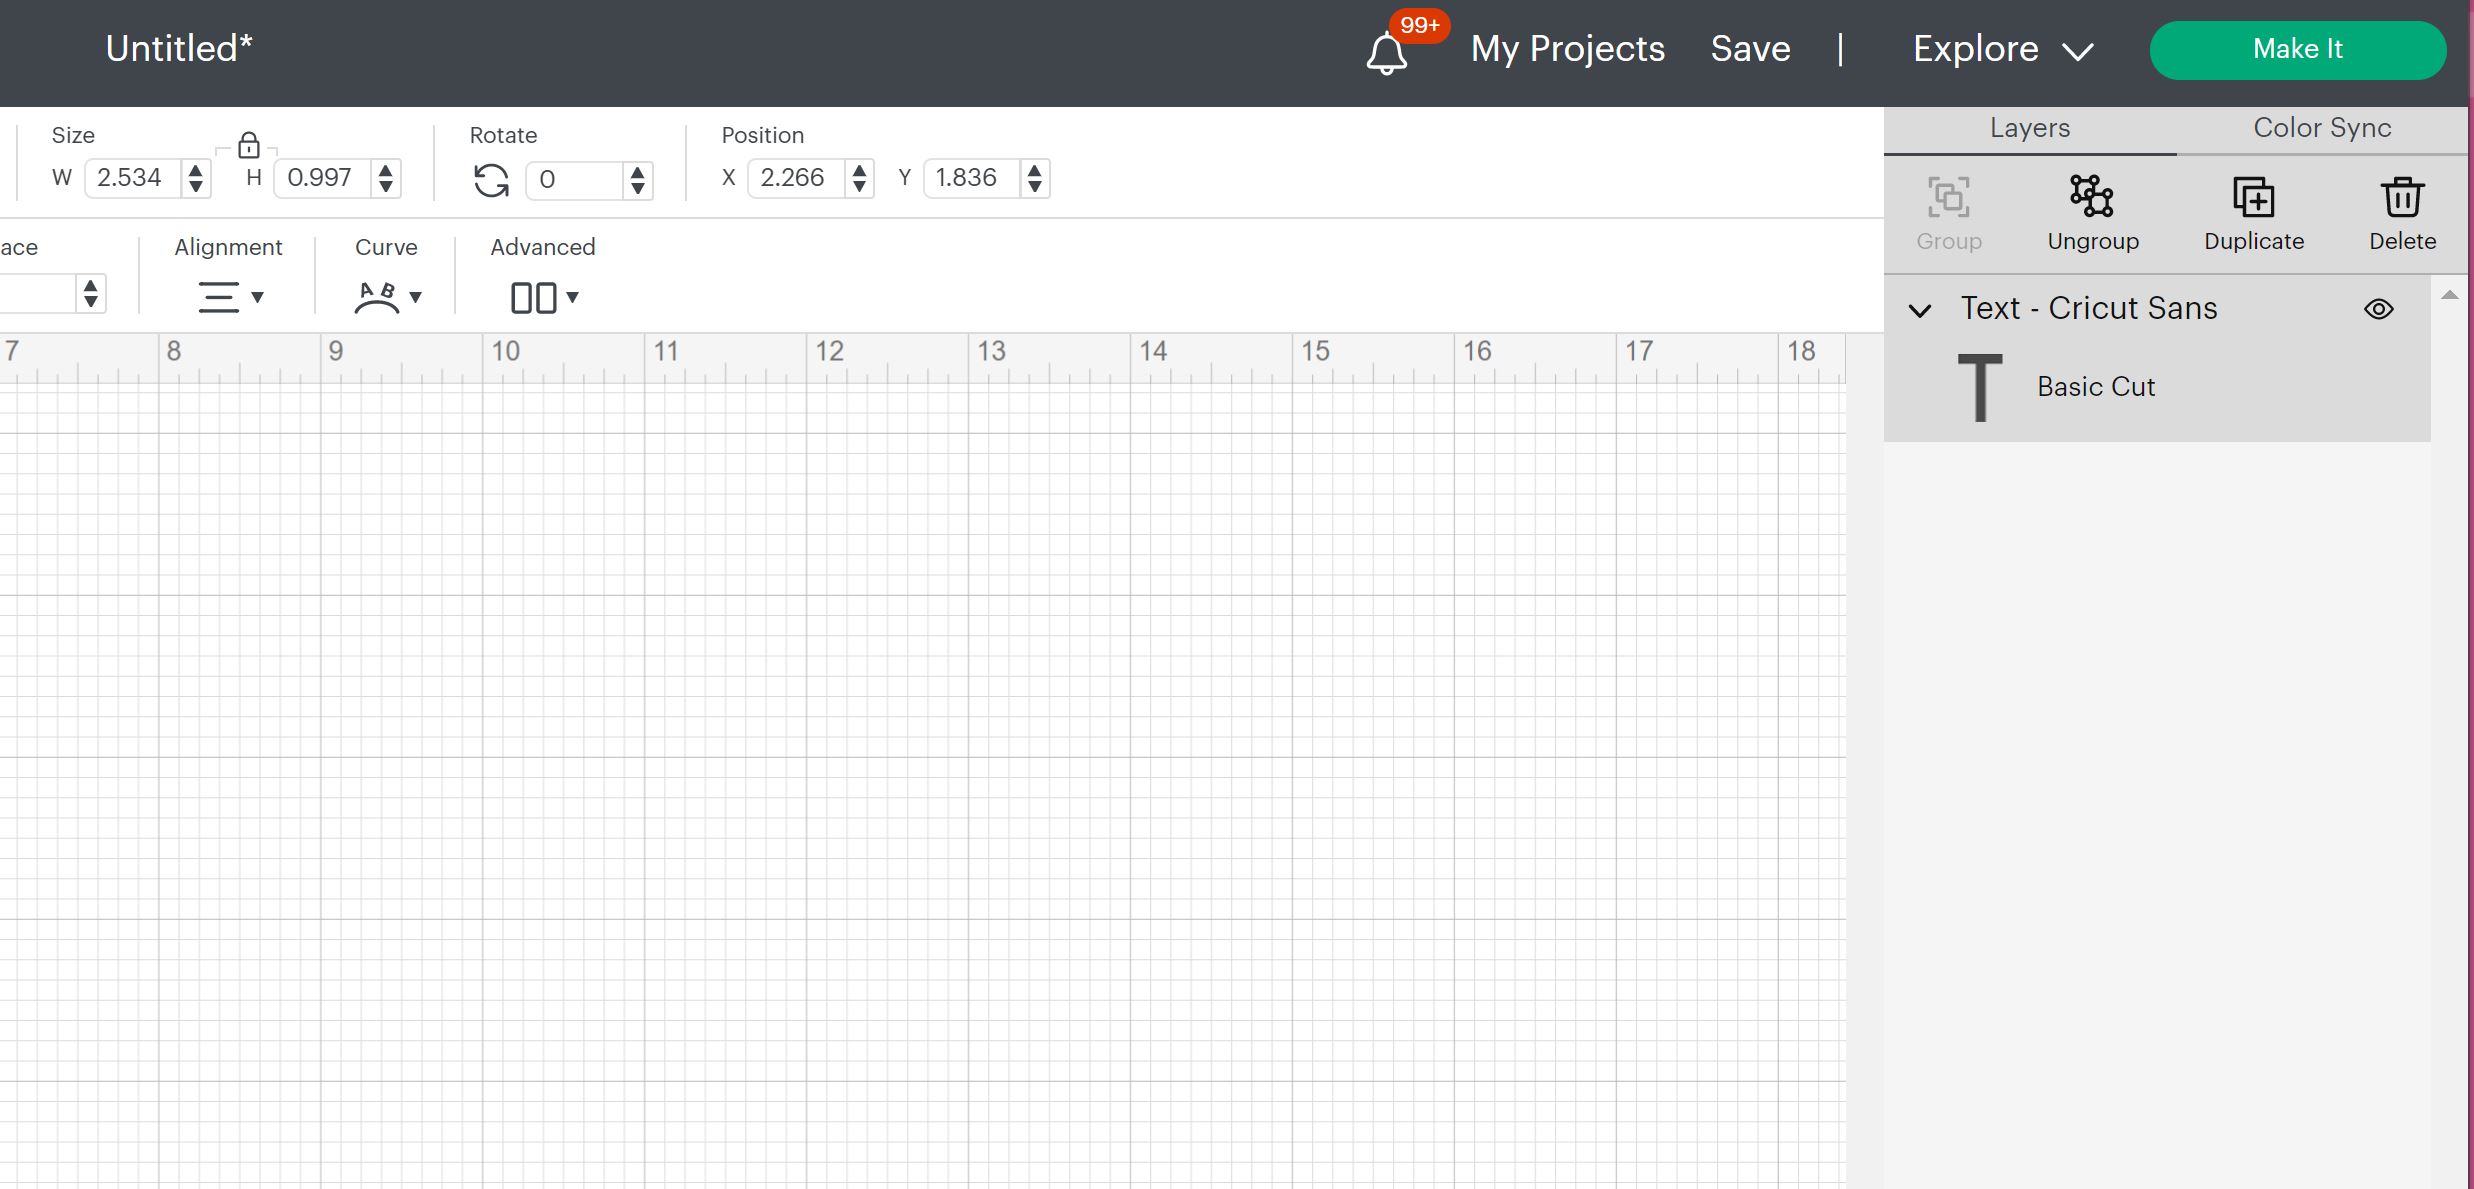
Also on the right-hand side, you will find additional options at the top.
- Notifications - the bell gives you notifications if you have a public Cricut profile.
- My Projects - click this to find all of your saved projects that you have made in Cricut Design Space.
- Save - save your current project. You will be able to name the project and put it into a collection if you would like to organize your projects and find them easier later.
- Machine Selection - pull down to pick the machine you are using. Options in Design Space will change based on the machine selection.
- Make It Button - when you are ready to cut your project click “make it” to see your mats and pick your material.
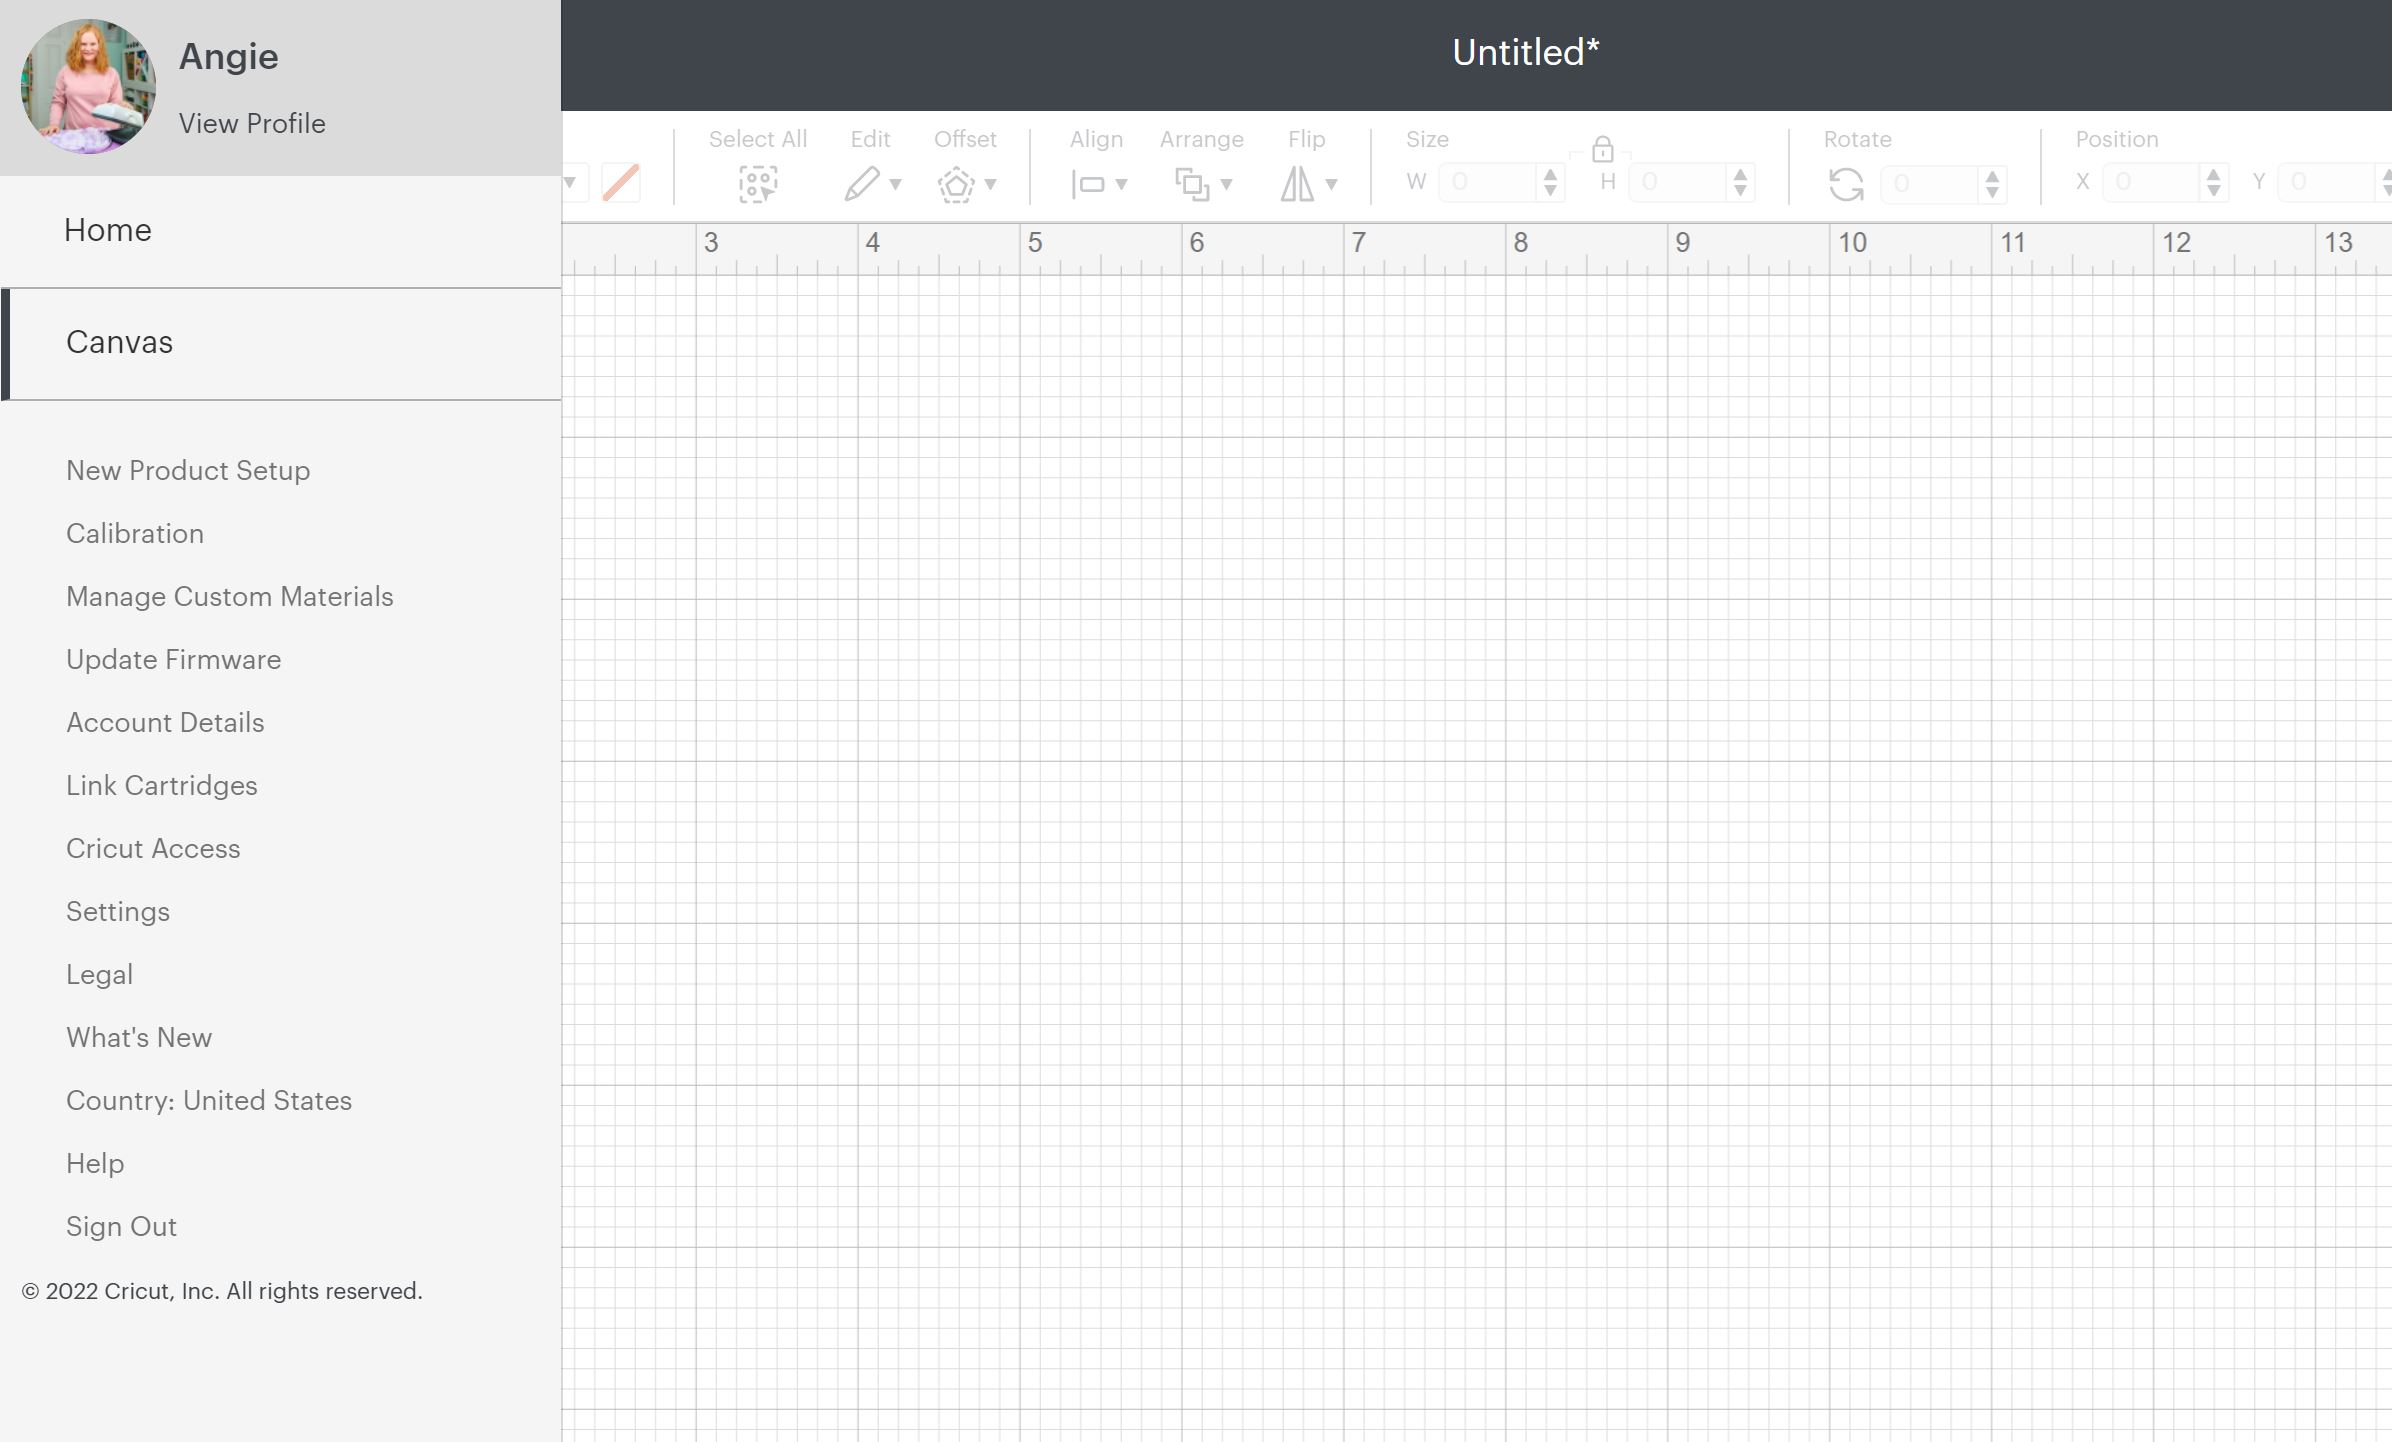
Hamburger Menu Tools
The last menu that you may need is referenced as the “hamburger menu” and it can be accessed by clicking the three lines in the upper left-hand corner. On this menu, you will find some options that you may find useful.
- Home - go back to the home screen in Design Space.
- Canvas - return to your canvas and design.
- New Product Setup - use this to set up a new machine or heat press.
- Calibration - depending on the machine you have, you can use this to calibrate print then cut, knife blade, rotary blade, etc.
- Manage custom materials - Cricut Design Space has hundreds of material settings pre-programmed but you can also use this option to add your own.
- Update firmware - use this if you are having issues with your machine.
- Other - here you will also find a variety of other settings and profile information that can be altered.
Now you should have a basic understanding of the buttons in Design Space and what each of them does. I would encourage you to play around and try to design a project. Often learning by actually doing is the best way to master a new skill.
I personally love showing people all about their new machines and encouraging them to start creating! You can find more of my posts as well as Cricut projects on my blog The Country Chic Cottage or you can follow my Cricut tutorials on my YouTube channel. If you would like a manual on using your machine, I am also releasing a book that you are going to love. Right now you can pre-order your copy here. It dives deeper into Design Space and has a series of projects that you can create to help learn all about your machine.
So, don’t be intimidated by your Cricut! Use this guide to Design Space menus to learn the basic functions and just dive in. I know you can create something amazing!