
Step 1: Prep Your Puzzle
Some people take the cardboard off of the puzzle first, but we found that it is easier to keep the cardboard rectangle behind the puzzle to hold it in place. This also helps with easy transport after pressing.
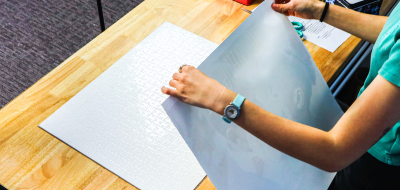
Place your puzzle on the table with the cardboard backing intact.
Lay your sublimation transfer paper facedown on top of the puzzle.
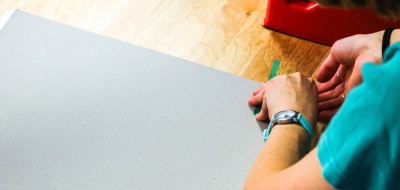
Use thermal tape to secure the transfer paper so it doesn’t shift during pressing.
Step 2: Get Ready to Press
Put your puzzle (with the sublimation transfer taped in place) face up on your press.
Add a piece or two of Kraft paper on top of your puzzle. This ensures that none of the sublimation ink will get onto your press.
Step 3: Press the Puzzle
Press your puzzle at 380°F for 60 seconds using medium pressure.

Step 4: Peel Off the Transfer
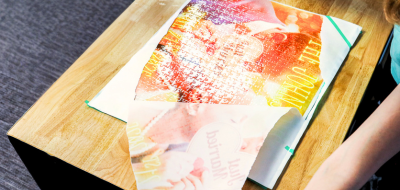
Carefully remove the top layer of Kraft paper.
Using a heat-resistant glove, take your puzzle off the heat press to avoid burns.
Peel the sublimation transfer paper off hot to reveal your final design.

Final Reveal
Now you have a beautiful custom puzzle – perfect as a wedding, anniversary, or personalized gift.
Extra Tip: Keeping the cardboard piece under the puzzle during pressing allows for easy transport and gifting without losing puzzle pieces. Adding a puzzle tin to the puzzle will make for the perfect finishing touch.
Materials Used: