
Want to add some sparkle to your next project? Creating rhinestone transfers is easier than you might think! Once you get the hang of it, you’ll be blinging out tees, hoodies, and tote bags in no time. ?
What You’ll Need
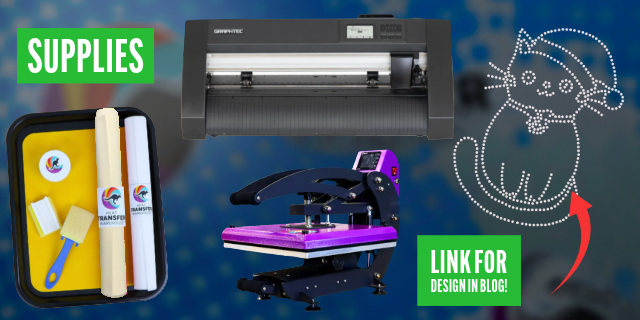
Grab your essentials before you start:
- Rhinestone design, we grabbed ours from Creative Fabrica
- Vinyl cutter
- Heat press
- Hot-fix rhinestones
- Flock (aka Rhinestone Material)
- KTM
- Brush & tray (We are using the Rhinestone Starter Bundle)
- Tweezers (for the stubborn ones ?)
- Squeegee
Let’s Get Sparkly! Step-by-Step
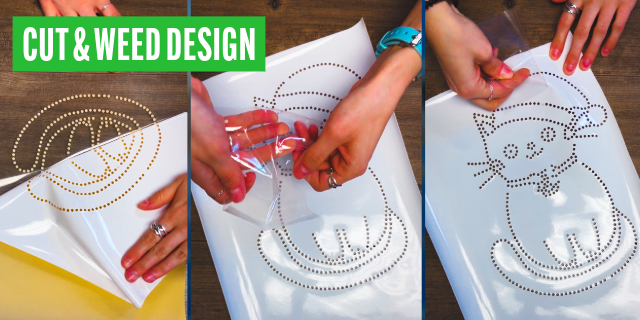
1. Cut your design. Load your template material (sticky side up) and cut your rhinestone design using your cutter.
2. Weed the holes. Peel off the excess material so you see your stone holes clearly. Pro Tip: Use a high tack mask to remove the stone hole pieces
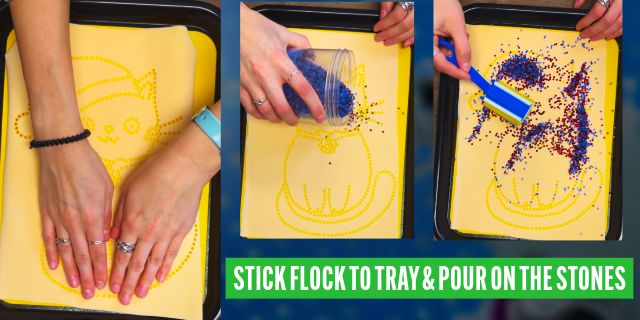
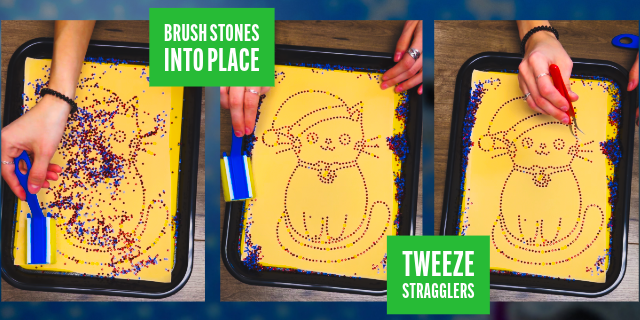
3. Peel your flock material off the liner, and stick it down on the rhinestone tray. Pour your rhinestones onto the template and gently brush them into the holes — they should fall in shiny side up!
4. Fix the stragglers. Any upside-down stones? No problem — just flip them with tweezers or your favorite weeding tool.
5. Mask it. Lay your KTM rhinestone transfer mask on top, sticky side down, and press firmly with your hand or squeegee so all stones stick.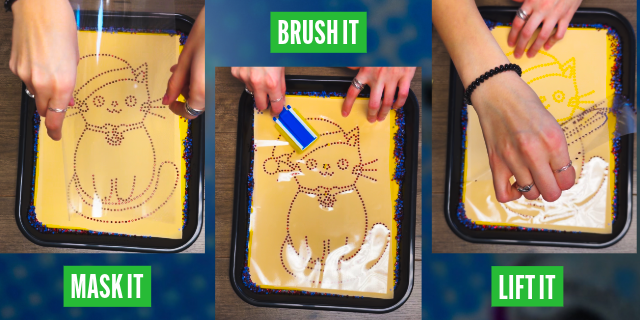
6. Lift your design. Slowly peel up the mask — your rhinestones will lift right off!
7. Press & shine. Position the design on your shirt, press at about 305°F for 10–15 seconds, then let it cool before peeling.
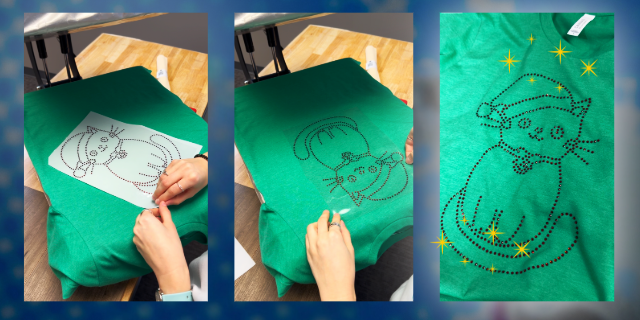
Boom!— you just made your first custom rhinestone transfer!
Tips from the Pros
- Keep it simple for your first try (one color, one size).
- Press on smooth, flat garments for best results.
- Always cold peel — it helps the glue lock those rhinestones in place.
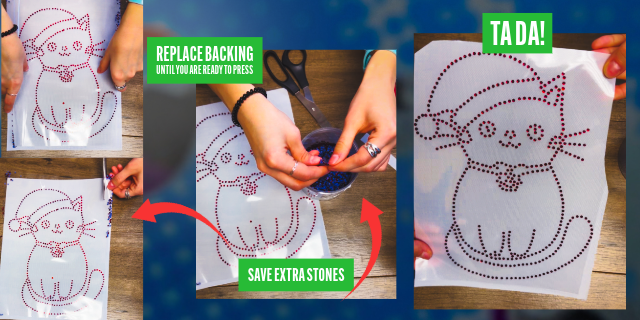
- Store unused transfers flat until you’re ready to press.
Now you’re ready to add some serious sparkle to your creations! ✨