
Updated 4/27/21
What are Heat Transfer Foils?
Heat Transfer Foils are heat transferable materials that are trending in the garment decoration industry. They are perfect for adding a true metallic element to designs! If you are not familiar with the title Heat Transfer Foils, perhaps you may know these as Screen Print Foils or even Hot Stamp Foils. These products come in a variety of titles; however, they are all the same. It is important to note that Heat Transfer Foil is not Heat Transfer Vinyl. Heat Transfer Foils are not designed to be cut in a vinyl cutter/plotter nor do they need to be weeded. They also do not include an adhesive. In this case, a separate adhesive material must be first applied to further apply Heat Transfer Foils.
Heat Transfer Foils - Application
Because Heat Transfer Foil is not Heat Transfer Vinyl, the application process between the two differs. Below, we break down the Do’s and Dont’s when applying Heat Transfer Foils:
Application - Do’s
1) Heat Transfer Foils are designed for short-term use/wear. Apply them to objects that are not going to be frequently washed. Such objects include: bags, graduations caps and even pillows!
2) Use an adhesive that is specially designed for Heat Transfer Foils. You can also use 1 color screen print transfers or trim-free transfer paper using black ink as substitutes for adhesive. Adhesive (sometimes referred to as foil receiving film) is a transparent-like material that works just like Heat Transfer Vinyl. You cut your design in reverse (liner side down) using a vinyl cutter/plotter, weed away the excess material and then apply it (liner side up) using an iron or heat press. Depending on what adhesive you use, it may require the liner to be peeled either hot or cold. We offer two adhesives for Heat Transfer Foils: EasyWeed Adhesive and HotMelt (Foil Receiving Film).
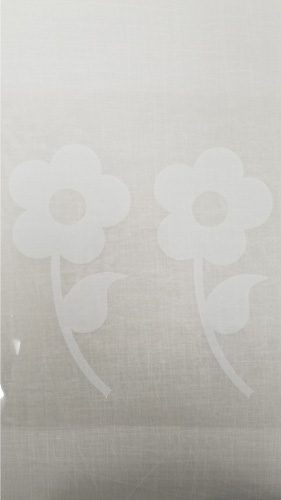
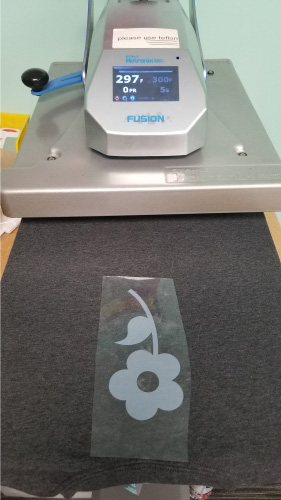
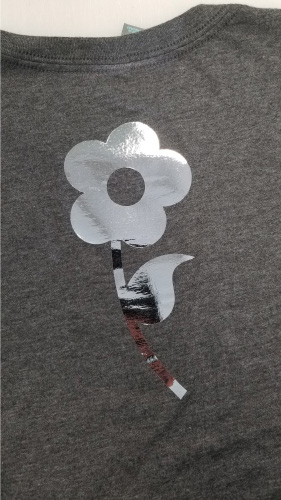
3) Heat Transfer Foils are 12 inches in width and come in rolls 25 feet in length. Using a scissors, cut the foil so you have just enough to fully cover the applied adhesive. Always apply the adhesive first! Then, when applying the foil, always ensure that it lays colored-side up.
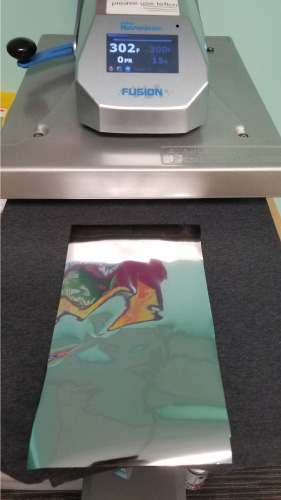
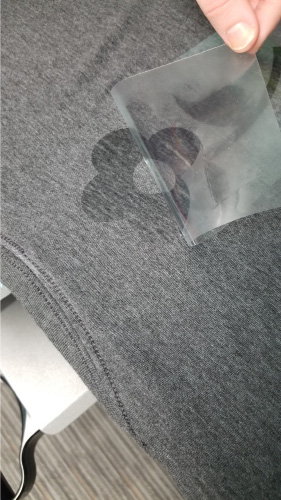
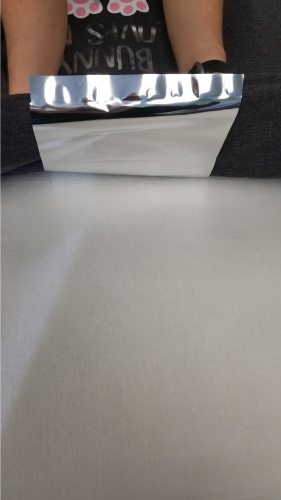
4) Always peel the foil COLD! The colder it is when you peel it, the better the results will be. It helps to rub the foil on a cold surface to help disperse the heat.
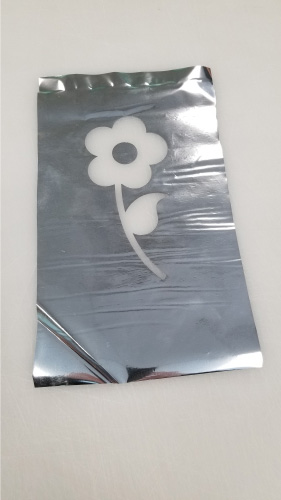
5) Tip: After peeling the foil, you can reuse the foil that did not stick to the adhesive!
6) Tip: Adhesive and Heat Transfer Foils may include a temperature range for recommended application. If you do plan on washing your finished design, make sure to apply both the adhesive and foil at the top of the temperature range. This will help your design withstand a wash cycle better than it would if applied at the bottom of the temperature range.
Application - Dont’s
1) Again, Heat Transfer Foils are designed for short-term use/wear. We don’t recommend applying them to objects that are going to be frequently washed.
2) As already mentioned, Heat Transfer Foil is not Heat Transfer Vinyl. Don’t attempt to cut these foils with a vinyl cutter/plotter. In this case, there will be no excess material to weed.
3) Don’t attempt to layer foils over Heat Transfer Vinyl.
4) Don’t use Heat Transfer Vinyl as a substitute for adhesive. You may find that Heat Transfer Foils will initially stick to Heat Transfer Vinyl; however, the foil will wear off very quickly because Heat Transfer Vinyl does not include adhesive on the top colored side (only on the underside).
5) When applying Heat Transfer Foils, don’t lay them colored-side down.
6) Don’t attempt to to layer foils, as they need adhesive to be applied (but there is a secret way to get a 2-tone look… read below).
Innovative and Creative Ways to Apply Heat Transfer Foils
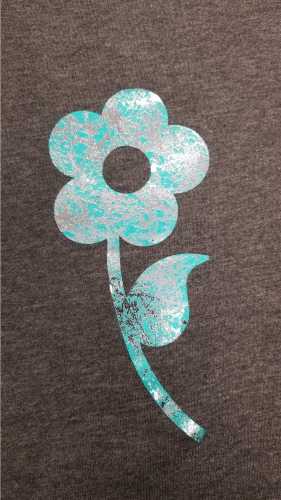
Heat Transfer Foils aren’t designed to be layered; however there is trick in which you can layer them to get a 2-tone look! In order to get a 2-tone look, you must use the Distressed method:
Distressed Heat Transfer Foil Method
1) First, apply your adhesive (or adhesive substitute) as you would when applying any Heat Transfer Foil.
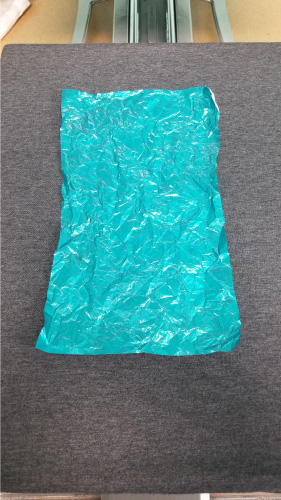
2) Take your Heat Transfer foil and crumple it. This will cause some of the foil to break off and crack.

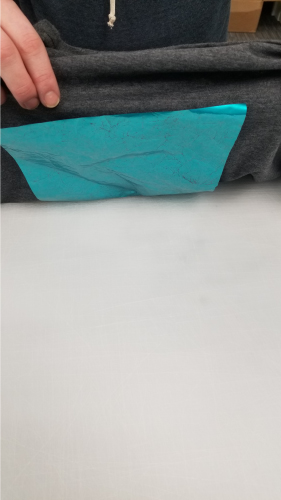
3) Apply the distressed foil over the adhesive using the same instructions as already discussed above.
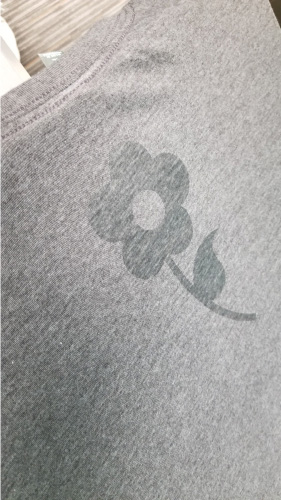
4) Always peel the foil COLD! Once again, the colder it is when you peel it, the better the results will be. It helps to rub the foil on a cold surface to help disperse the heat. Once you peel the foil, you will notice that the crumpling has caused the foil to produce a cracked, distressed look. You can certainly stop here if you wish to not apply another foil and simply have a one-colored distressed look. However, there are now cracks in the foil, creating openings for additional foil to adhere to the adhesive.
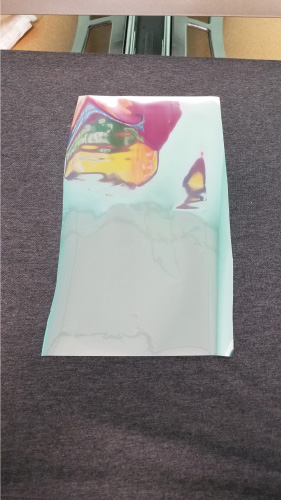
5) Place another sheet of Heat Transfer Foil over the already-applied distressed foil (but don’t crumple this foil). Apply it using the same recommended application instructions.
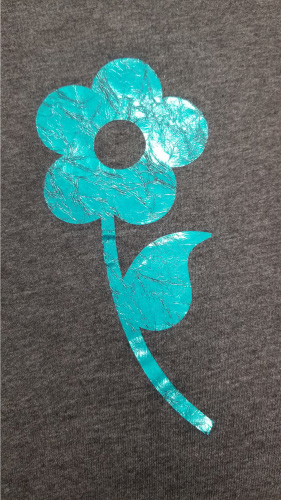
6) Once you apply the second layer of foil and peel it COLD, you will notice that the foil adheres to the open adhesive that was created due to the cracks in the first distressed-foil layer. As a result, you end up with a 2-tone Heat Transfer Foil design!
Check out this video tutorial!